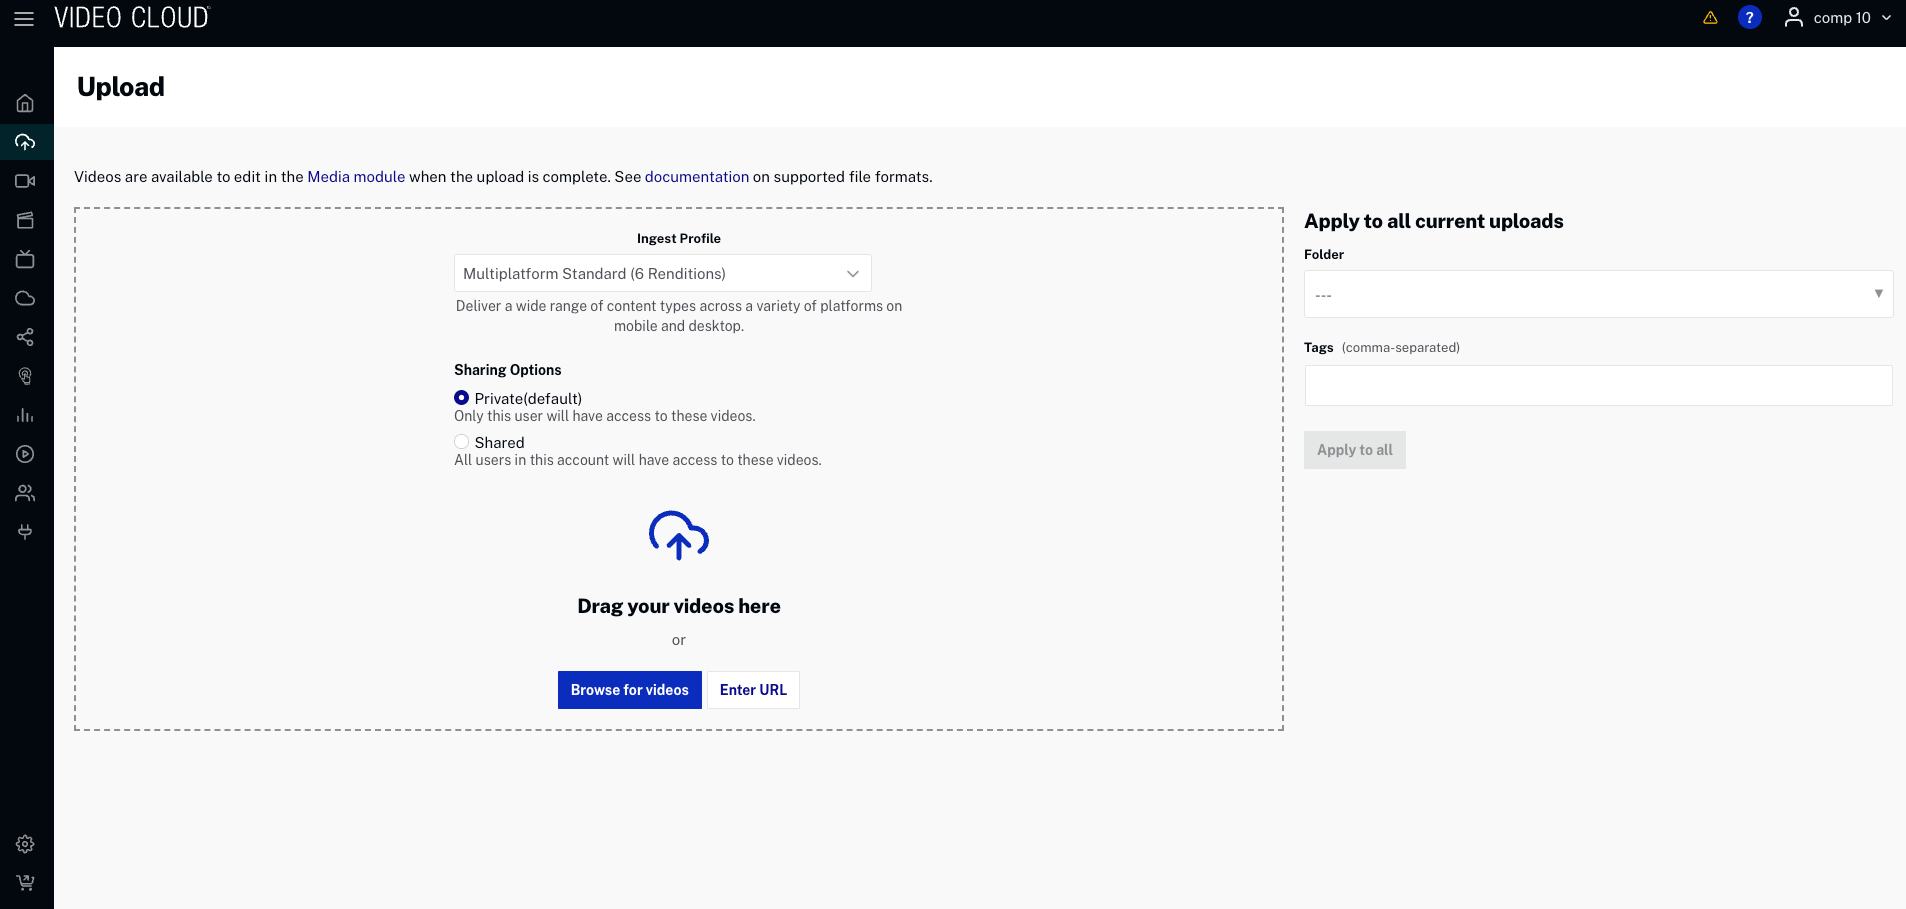
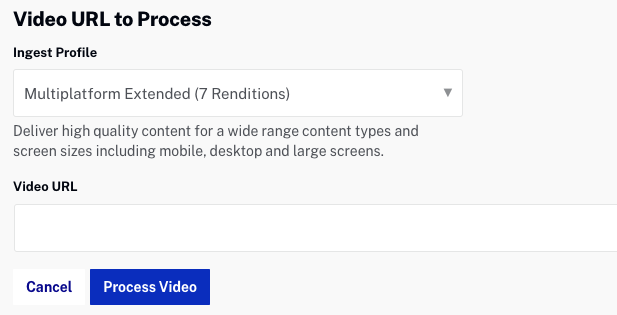
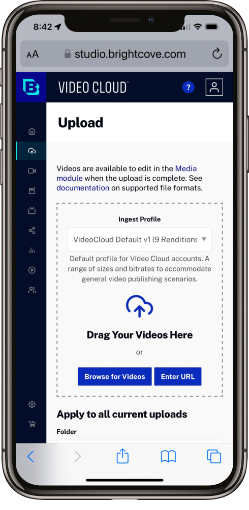
The Upload module uses a dynamic ingest process to retrieve and transcode video content. When you select a file to upload, Video Cloud uses a pull-based process to pull the content from a storage location where it then uses the Zencoder transcoding service to transcode the content.
To access the Upload module, open the Upload module.
For information about video formats and codecs, and what source video formats are supported by Video Cloud, see Supported Video Codecs and Containers.
Before uploading videos, select an ingest profile. The ingest profile contains the transcode settings that will be used when the videos are transcoded. The list of available ingest profiles will vary based upon how your Video Cloud account is configured. In the following screen shot, both CONTEXT AWARE ENCODING and DYNAMIC DELIVERY profiles are available.
The video renditions that are created are based upon the ingest profile that is selected. For specific details on the Brightcove supplied ingest profiles, see Standard Ingest Profiles for Dynamic Delivery and Context Aware Encoding
The image dimensions for the poster and thumbnail images are based upon the image dimensions specified in the ingest profile.
There are several reasons why you might want to choose an ingest profile that creates MP4 renditions:
If any of these use cases are important to you, Brightcove recommends selecting an ingest profile that generates one or more MP4 renditions.
If the account is enabled for auto captioning and a Dynamic Delivery ingest profile is selected, an Auto captioning option will be displayed.
For information on auto captioning, see Automatically Generating Captions for Videos.
If the account is enabled for forensic watermarking and a Dynamic Delivery ingest profile is selected, an option to enable forensic watermarking will be displayed.
For information on forensic watermarking, see Overview: Forensic Watermarking.
You can now choose whether to upload a video as Private or Shared. This gives you greater control over who can access your content.
When uploading a video, you will see the following options:
Private: Only you will have access to this video. Other users in your account will not be able to see or edit it.
Shared: All users in your account will have access to the video.
After the upload is complete, you will find you videos in the Media Module:
If you uploaded the video as Private, you’ll find it under My Videos.
If you uploaded the video as Shared, it will appear in the Shared Videos.
Videos can be uploaded using one of these methods:
Once the files have been selected, the file upload will begin. To cancel the upload, click
. Click to remove the file entry from the page. While uploads are in a processing state, do not close or move away from the browser window. Doing so may cause an incomplete upload.When the upload is complete, a Processing Complete status will display. This indicates the processing has completed and it is safe to navigate from the Upload module.
Click
to view the ingest profile and a subset of the video properties. The ingest profile can be changed if the video transcoding has not started. The following video properties can be edited:By default, when a video is uploaded, the status is set to Active unless required fields are missing. If required fields are missing, a message will be displayed with the required fields highlighted in red. Videos with missing required fields can still be uploaded but they will remain Inactive until all of the required fields have values. For more information on working with required fields, see Setting Required Fields for Videos.
To learn more about video properties, see Editing Video Properties using the Media Module.
Click
to save any changes and begin the transcoding process.When the Upload Additional Assets account setting is enabled, the video properties panel will also display buttons allowing poster and thumbnail images to be uploaded along with the video. Click to choose poster and thumbnail images and then click Process to begin the transcode.
Note that the image dimensions for the poster and thumbnail images will be based upon the image dimensions specified in the ingest profile. For information on configuring the Advanced Upload account setting, see Managing Account Settings.
When uploading videos, a folder and tags for the videos being uploaded can be specified. The folder dropdown list will display a list of all the folders that have been created in the Media module. Click + Create folder to create a new folder and assign the video(s) to the new folder. When creating a new folder:
When a folder is selected, all uploaded videos will be added to that folder. For information on creating and assigning videos to folders using the Media module, see Organizing Videos Using Folders.
Tags can also be assigned to videos as they are uploaded. Enter a comma-separated list of tags to assign to videos.
After selecting a folder or adding tags, click
to save the changes. Note that the folder and tags will be applied to all videos that are uploaded, in the process of being uploaded or where the upload has finished and the video is still displayed in the Upload module ( button hasn't been clicked).The Media module is written entirely in HTML5 and can also be used on tablet and mobile devices. This allows you to shoot video with a mobile device and upload it to your Video Cloud account. To upload content from a mobile device, open the Upload module and select an ingest profile. When you click
, the photos application on the device will open. Select the videos to upload and click done. The videos from the mobile device will begin uploading and the progress will be displayed on your device.If you are providing a URL for Video Cloud to fetch your videos, and you are sending credentials as part of the URL, you need to percent-encode certain reserved special characters:
Character | Percent-Encoded |
---|---|
] | %5B |
[ | %5D |
? | %3F |
/ | %2F |
< | %3C |
~ | %7E |
# | %23 |
` | %6D |
! | %21 |
@ | %40 |
$ | %24 |
% | %25 |
^ | %5E |
& | %26 |
* | %2A |
( | %28 |
) | %29 |
+ | %2B |
= | %3D |
} | %7D |
| | %7C |
: | %3A |
" | %22 |
; | %3B |
' | %27 |
, | %2C |
> | %3E |
{ | %7B |
space | %20 |
For example:
/* unencoded */
ftp://user@example.com:pass!word@example.com/path/to/input.mp3
/* encoded */
ftp://user%40example.com:pass%21word@example.com/path/to/input.mp3
The upload process seems to hang or makes no progress
Try clearing the browser cache and then upload the video again. We have seen that clearing the browser cache will help resolve video upload issues.
The difference between the request time and the current time is too large.
This error will occur when the system time on the machine uploading videos is not set correctly. This usually happens after a time change. Make sure your machine is set to the correct time.