Creating a YouTube destination
Create a YouTube destination when you want to publish videos to a YouTube channel. Before creating a YouTube destination, you may want to verify your YouTube account. Once you've verified your account, you will be able to upload videos longer than 15 minutes.
To create a YouTube destination, follow these steps.
- Open the Social Module.
- Click Destinations in the left navigation.
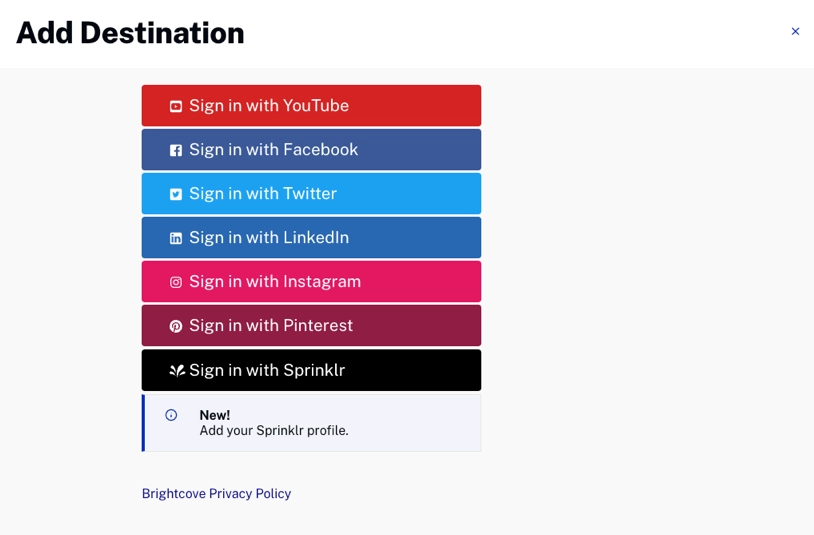
- Click .
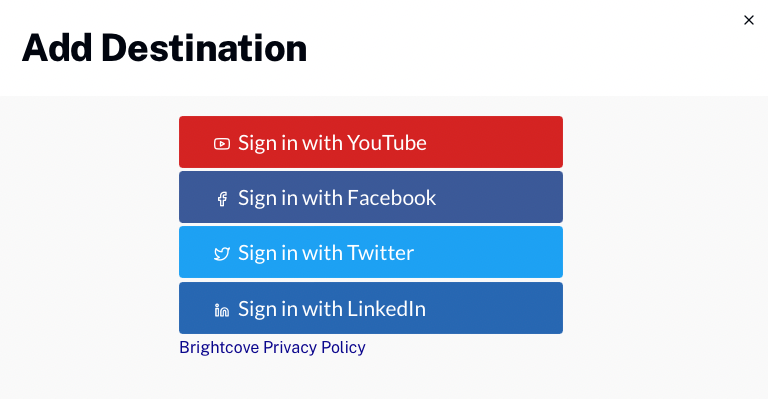
- Click Sign in with YouTube.
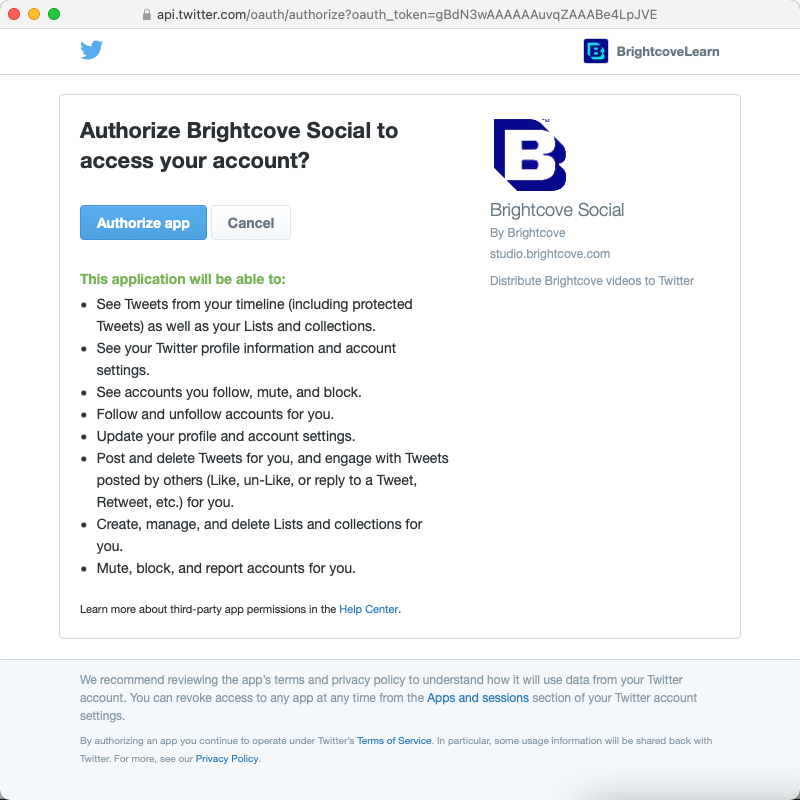
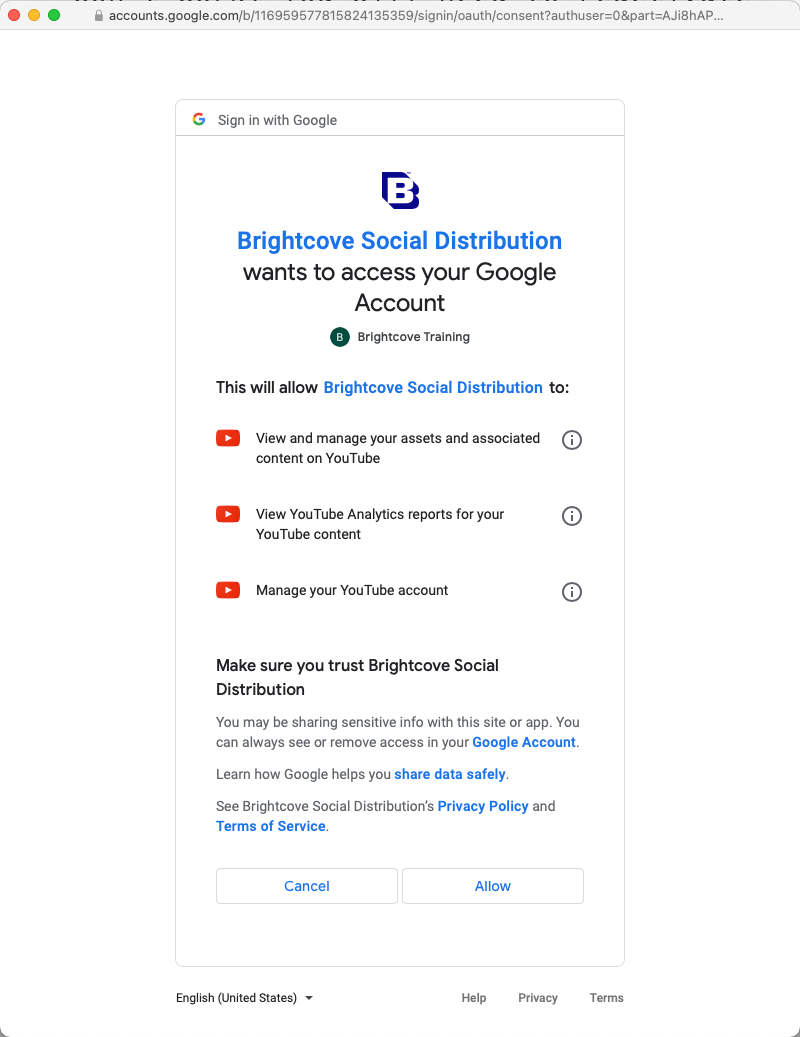
- You will be prompted to login to your Google account (if not already signed in). If you have multiple accounts, make sure you login to the account associated with your YouTube channel.
- A dialog will open requesting permission to manage your YouTube account. Check the upper right of the dialog to confirm you are using the correct Google account. If not, use the drop down to select the Google account you want to distribute videos to. Click Allow.
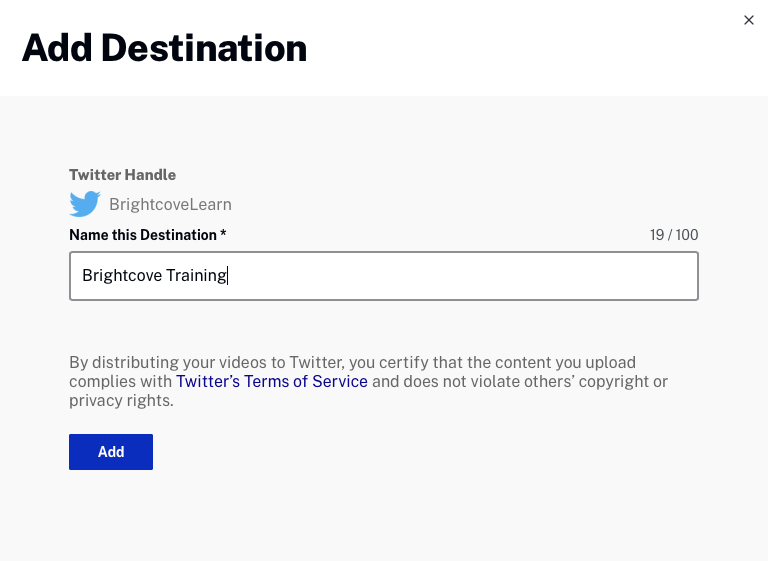
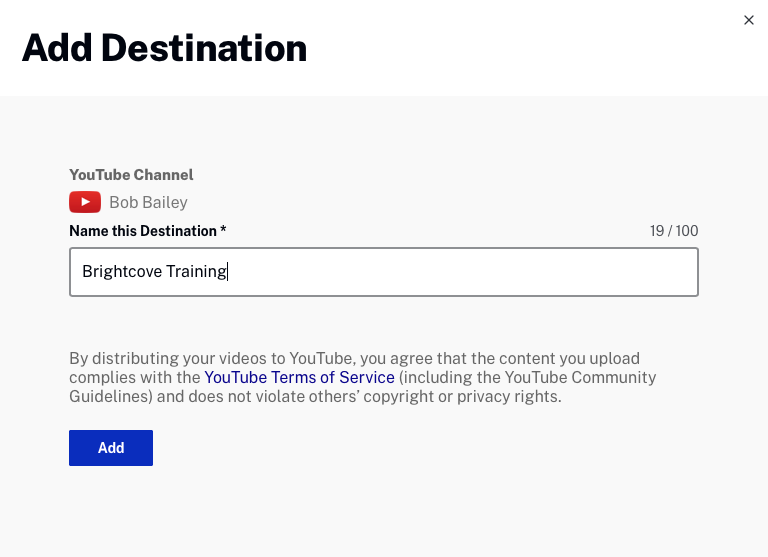
- Give the destination a unique, descriptive name. Click .
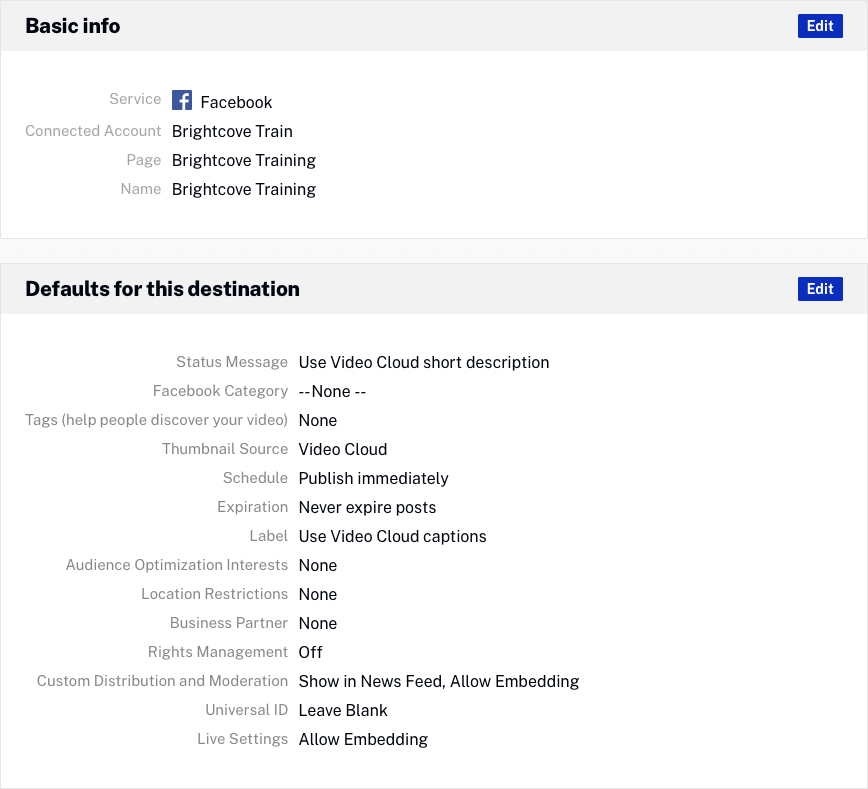
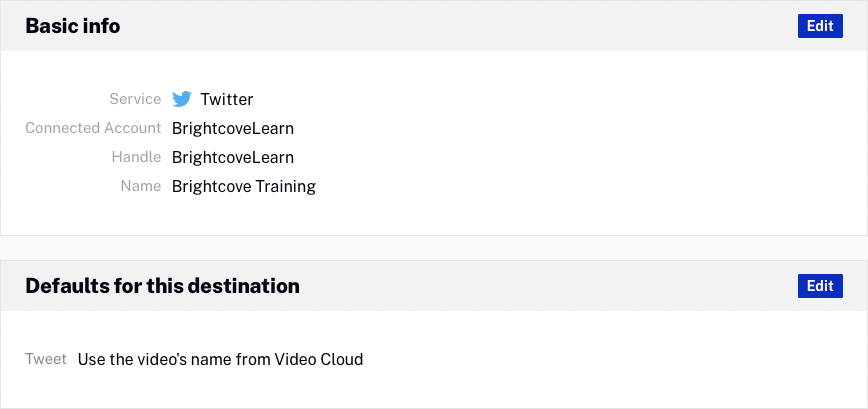
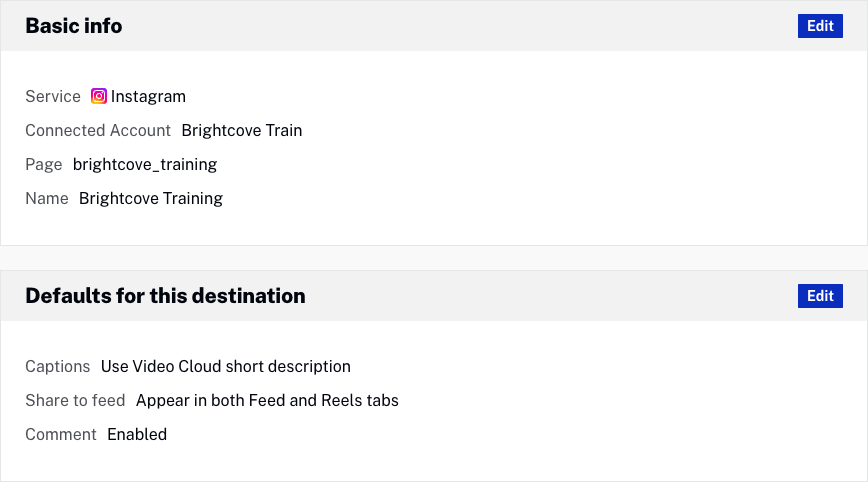
- Basic information and the destination defaults will be displayed. Click the button in the Basic info section to edit the destination name. See the Setting YouTube defaults section for information on configuring default values.

- Click Destinations in the left margin and confirm that the destination appears in the list of destinations. The value below the destination name is the destination ID.

Click the Destination Name to edit the destination. Click the link in the Channel/Page column to open the YouTube channel in another browser tab.