Introduction
This document will assist you in submitting your Brightcove {{ site.product_short }} app to the LG Store. The first section of this document, not including this one, lists information/assets you will need when you begin to complete the submission process.
Following that list is step-by-step guidance in the submission process.
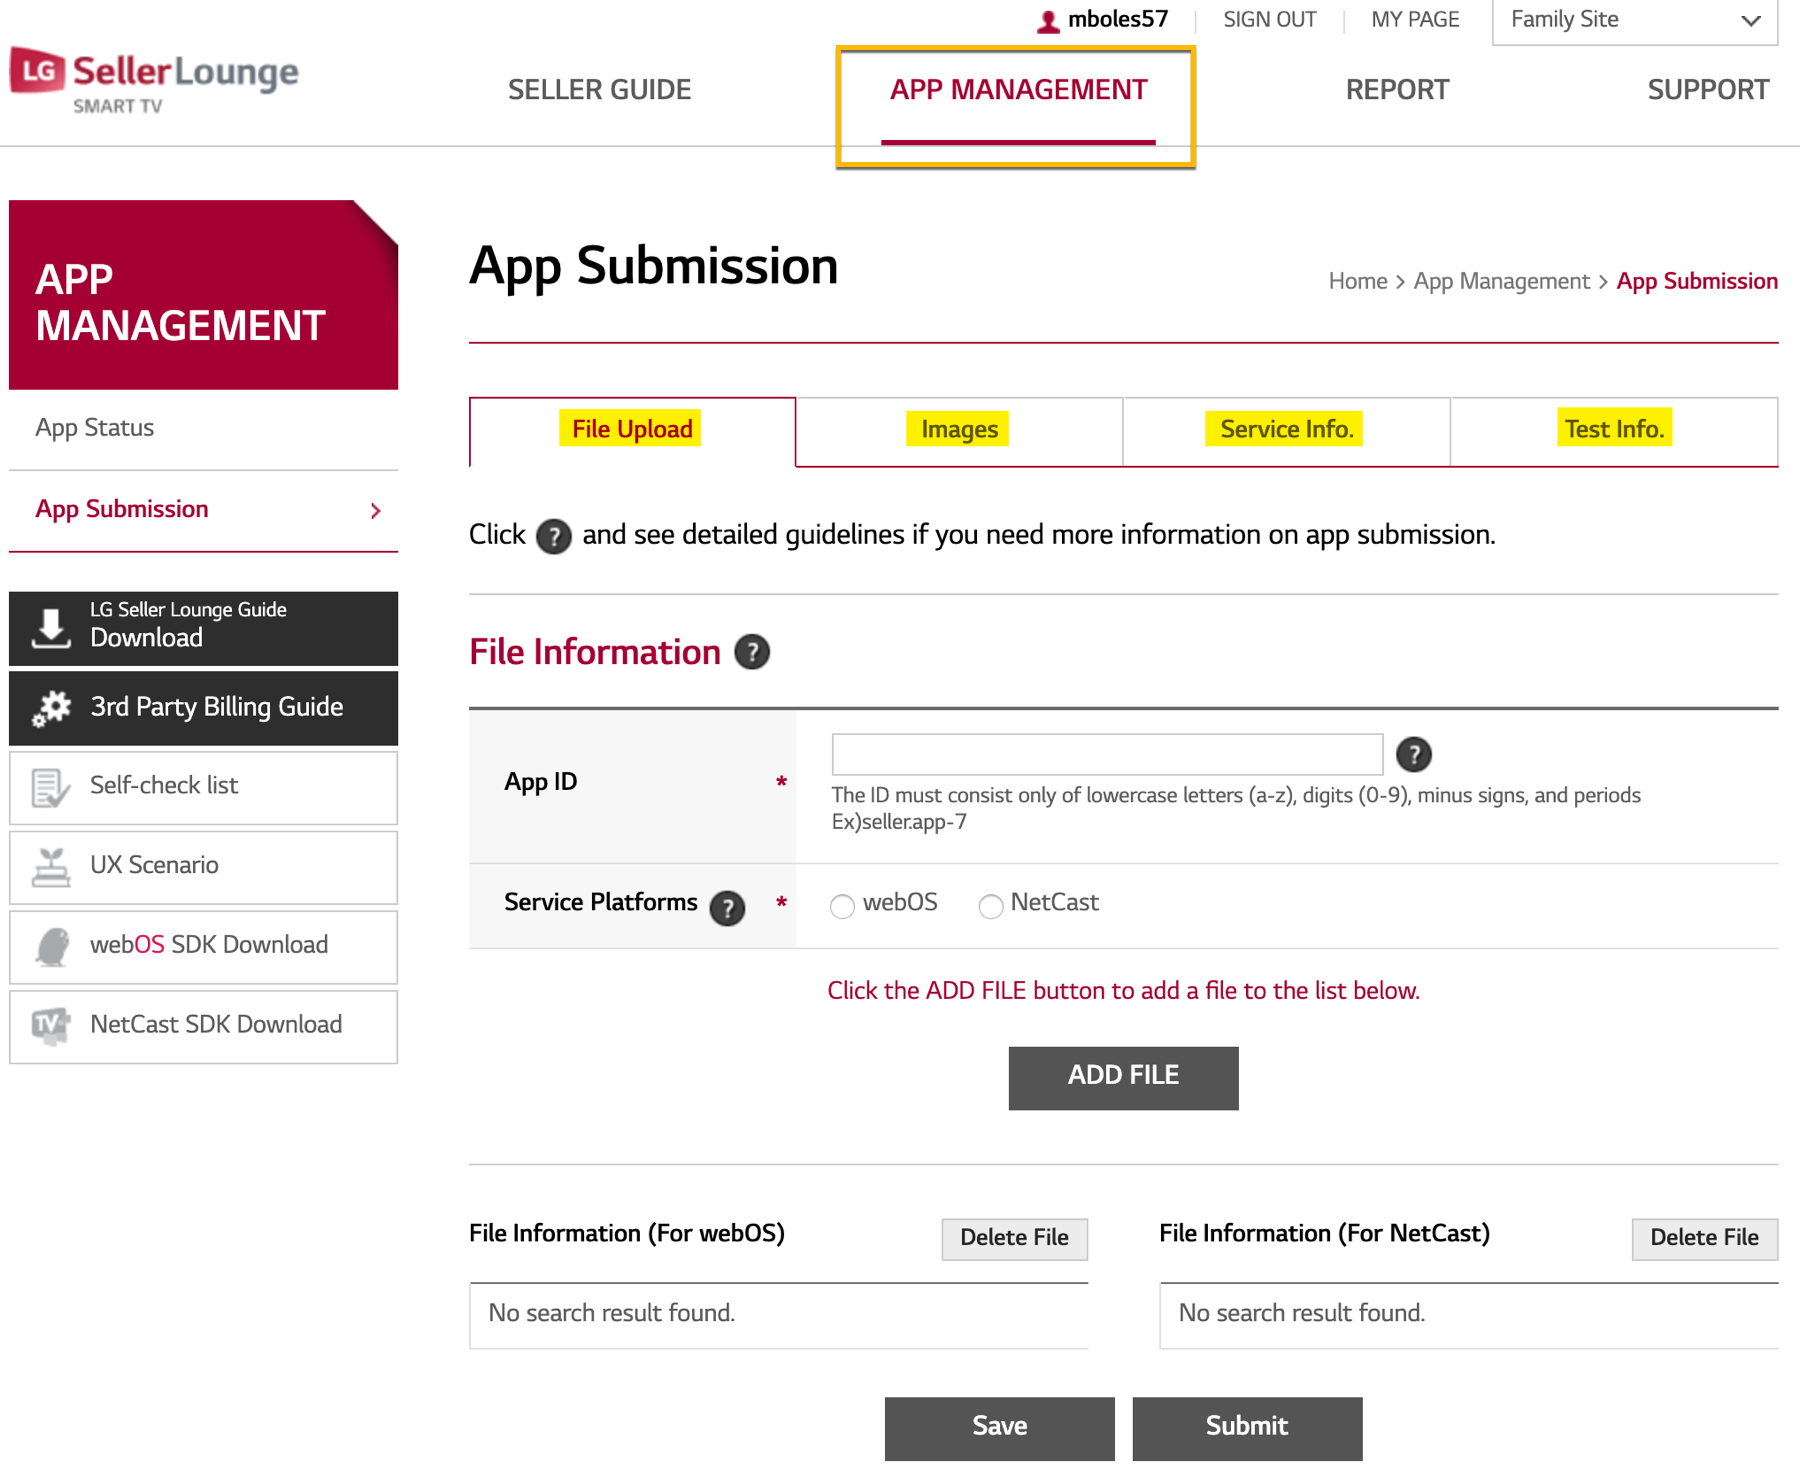
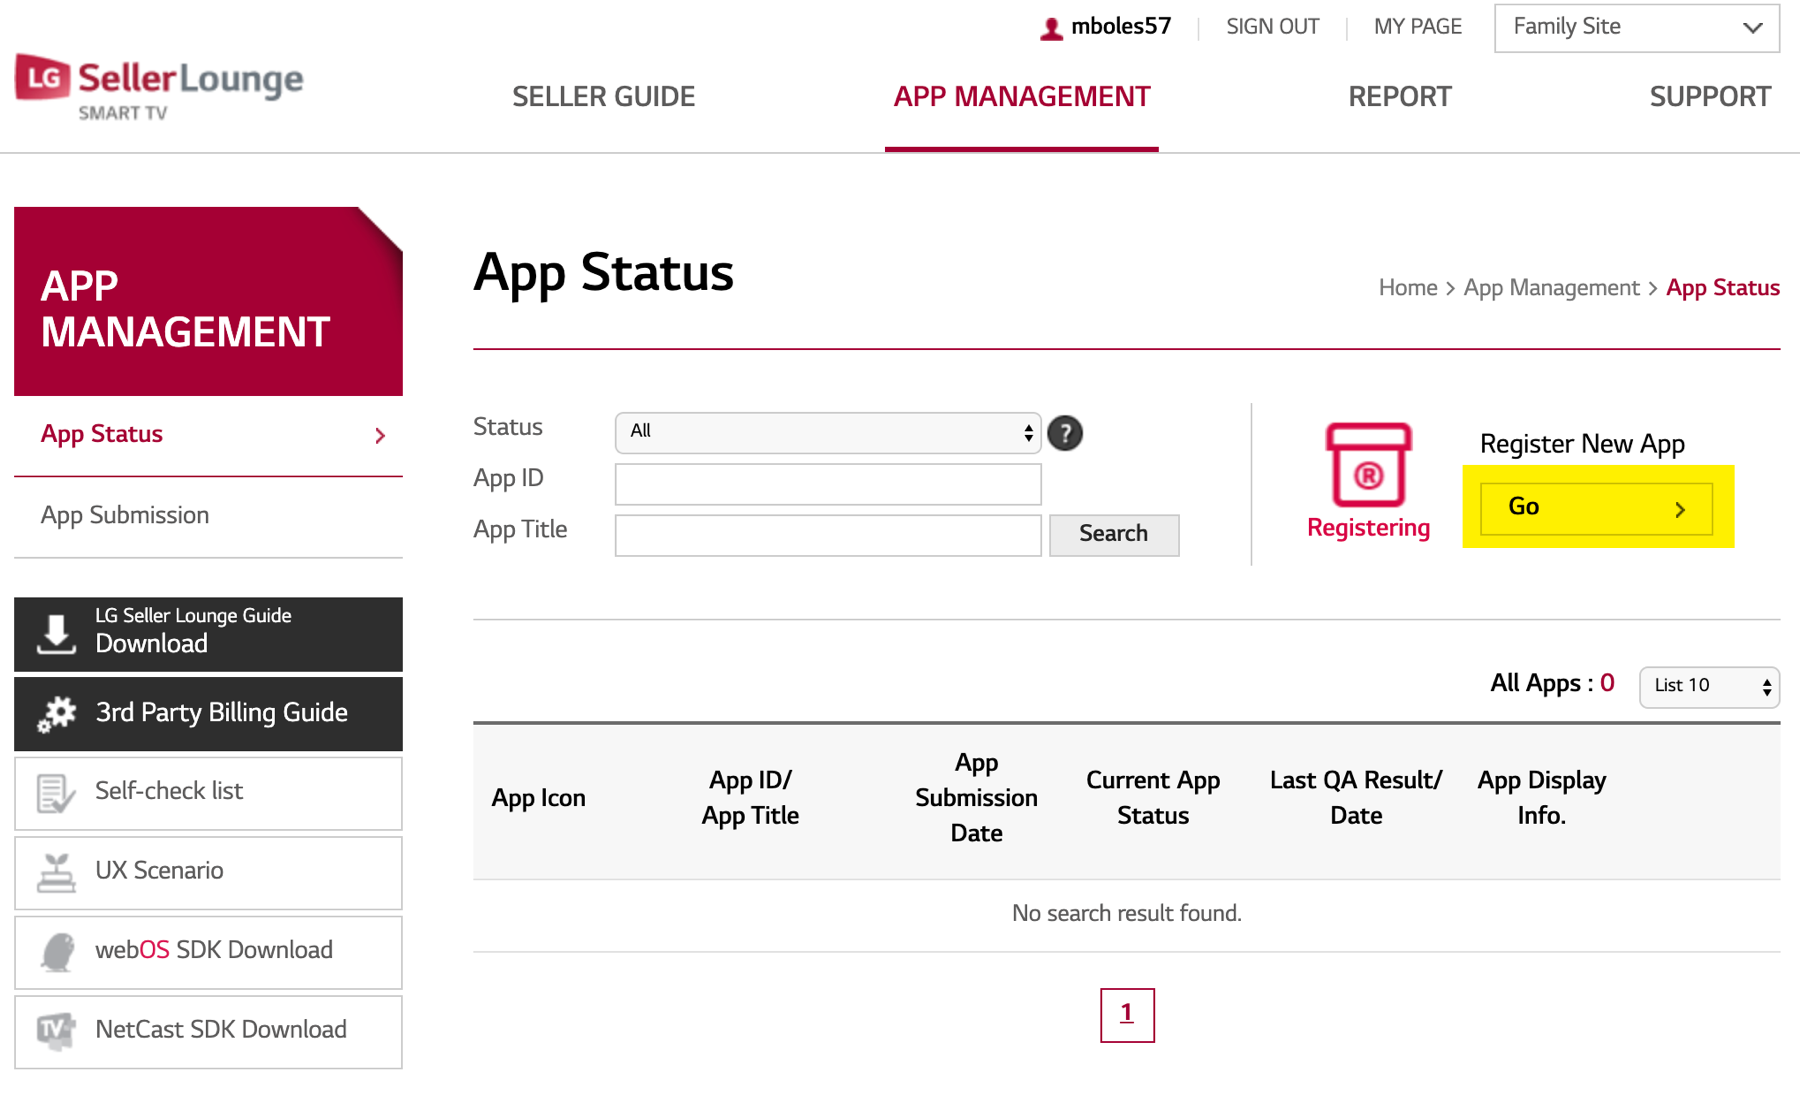
After you create your account you will proceed to supply information for the submission. The LG SellerLounge > App Management section appears as follows, and the areas in which you will need to enter information are highlighted in yellow:
Required information
The following information/assets will be required when submitting to the LG store.
Helpful information
- Store details: http://seller.lgappstv.com/seller/main/Main.lge
- Developer Account Setup: http://webostv.developer.lge.com/develop/app-test/#preparingAccount
- Submission Process: http://webostv.developer.lge.com/distribute/app-submission-process/
- Suggested lead time for approval: Three weeks
Required assets
- Application name
- Application description
- IPK (supplied by Brightcove) and Deeplink URL
- Deeplink URL (location for the app during testing, needs to be an Internet location under your control)
-
Images and graphical assets
-
App Icon
- Recommended: 400x400 pixels or greater(Square Type Only)
- Available File: JPG, GIF, PNG(Max 5MB)
-
App Tile Color
- Icon to display a solid background color
- Logo should have a flat background color and customer must provide Brightcove with the exact same hex value of that background color for the flat logo in LG webOS TV.
-
Primary Screenshot
- Recommended Image Size: 960x540, 1280x720 pixel (Square Type Only)
- Available File : JPG, GIF, PNG(Max 5MB)
-
Secondary Screenshots
- At least two (and at maximum five) secondary screenshots must be uploaded, with the same guidelines as the primary screenshot.
-
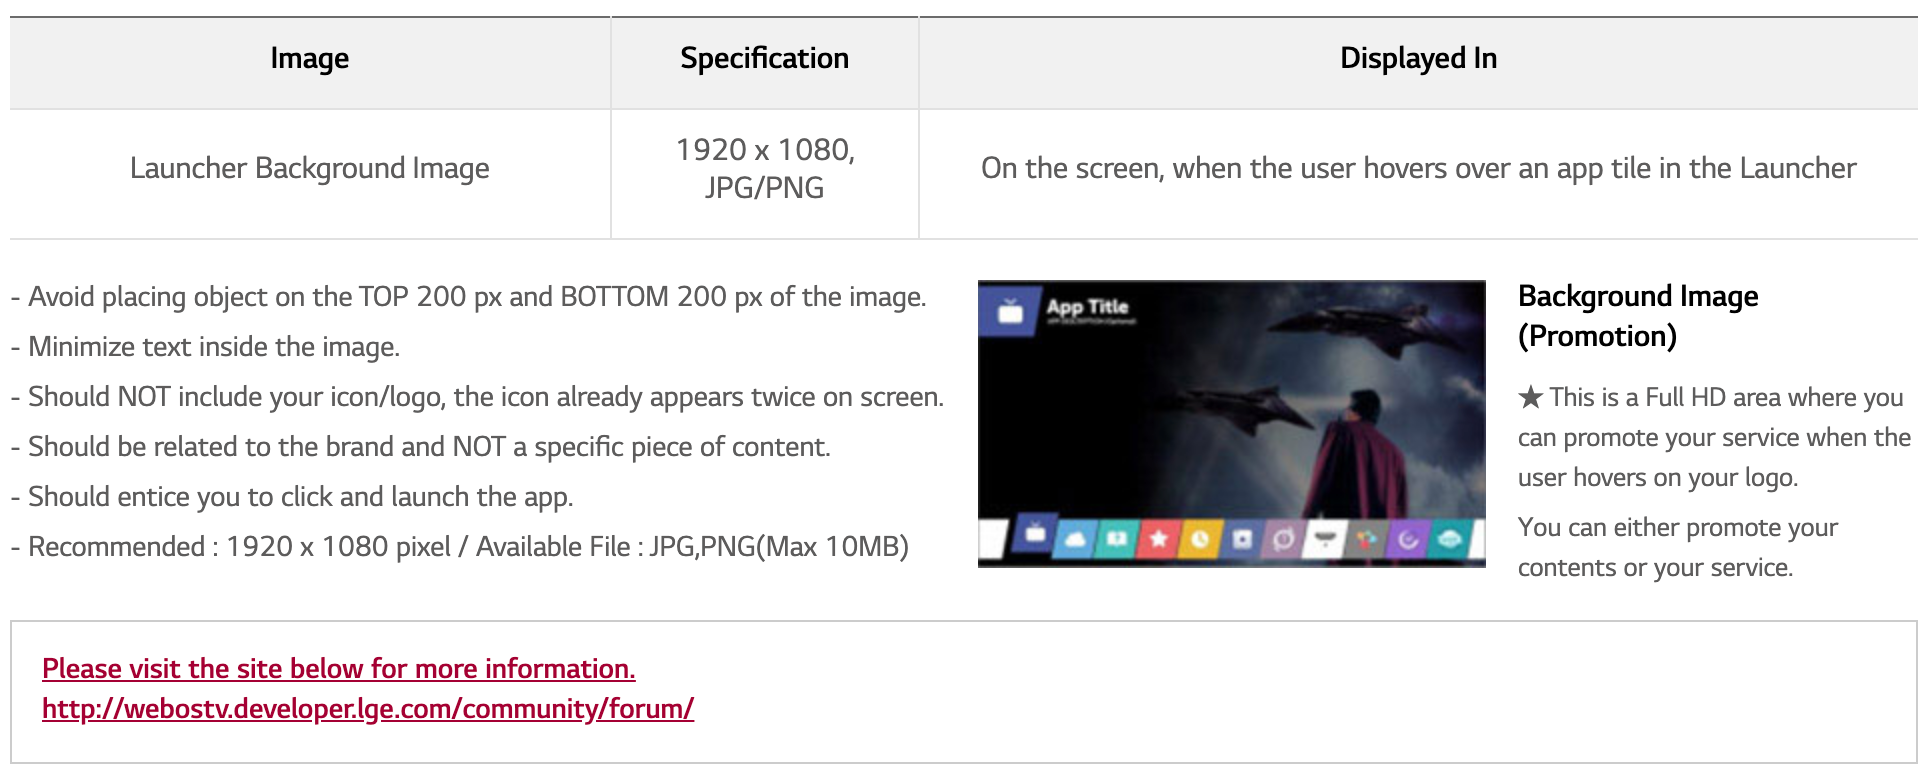
Launcher Background Image
- Recommended : 1920x1080 pixels
- File type: JPG, PNG (Max 10MB)
-
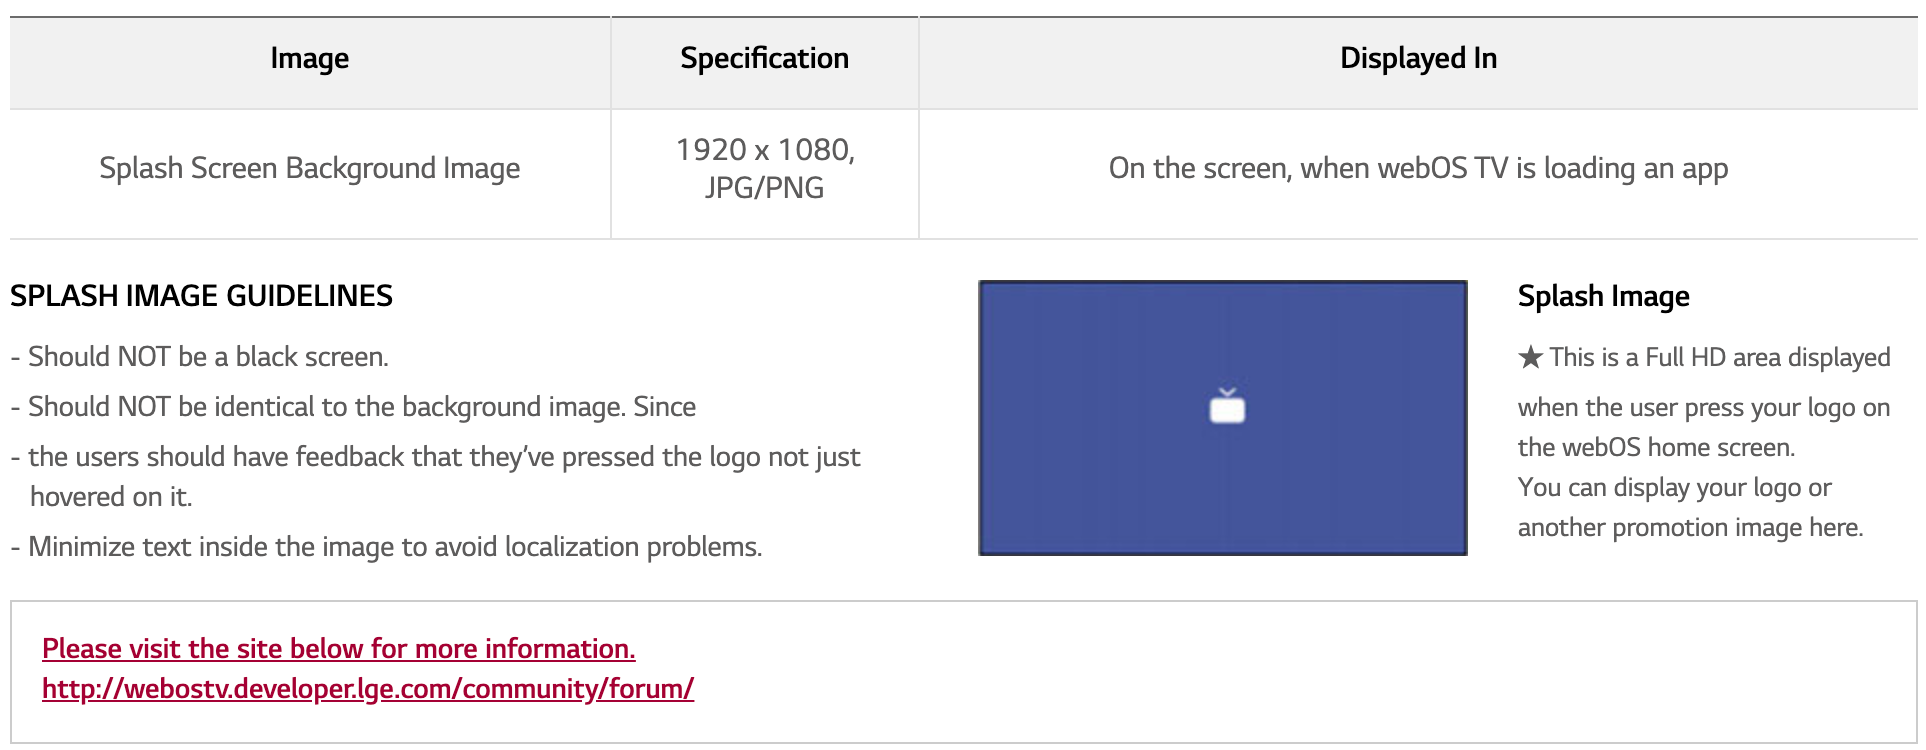
Splash Screen Background Image
- Recommended : 1920x1080 pixels
- File type: JPG, PNG (Max 10MB)
-
App Icon
-
Documentation
- Self-check list File: This is a spreadsheet with a list of test items against which you test your app. This item is detailed in the Completing the Test Info. section of this document.
- UX Scenario File: This is a PowerPoint presentation where you document what should happen as someone uses the app. This item is detailed in the Completing the Test Info. section of this document.
Getting started
-
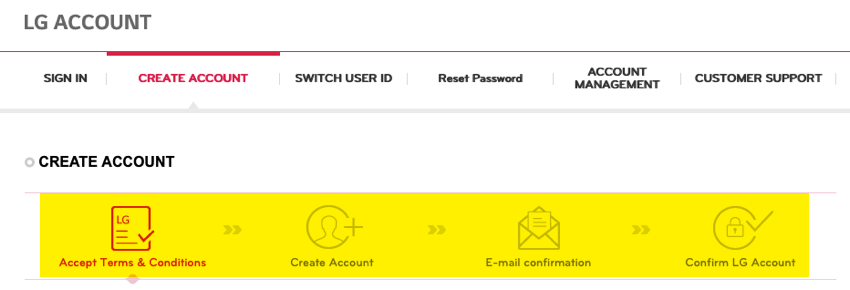
Browse to the
account creation page. The page appears as follows and you will need to complete the four steps.
- Once you have completed that account setup, browse to SellerLounge sign up. You will need to create another account here.
- After completing the second account sign up, you will be able to go to the SellerLounge and sign in.
-
Once in the SellerLounge, click on the APP MANAGEMENT tab.

-
To begin you app submission process, click the Go button.
-
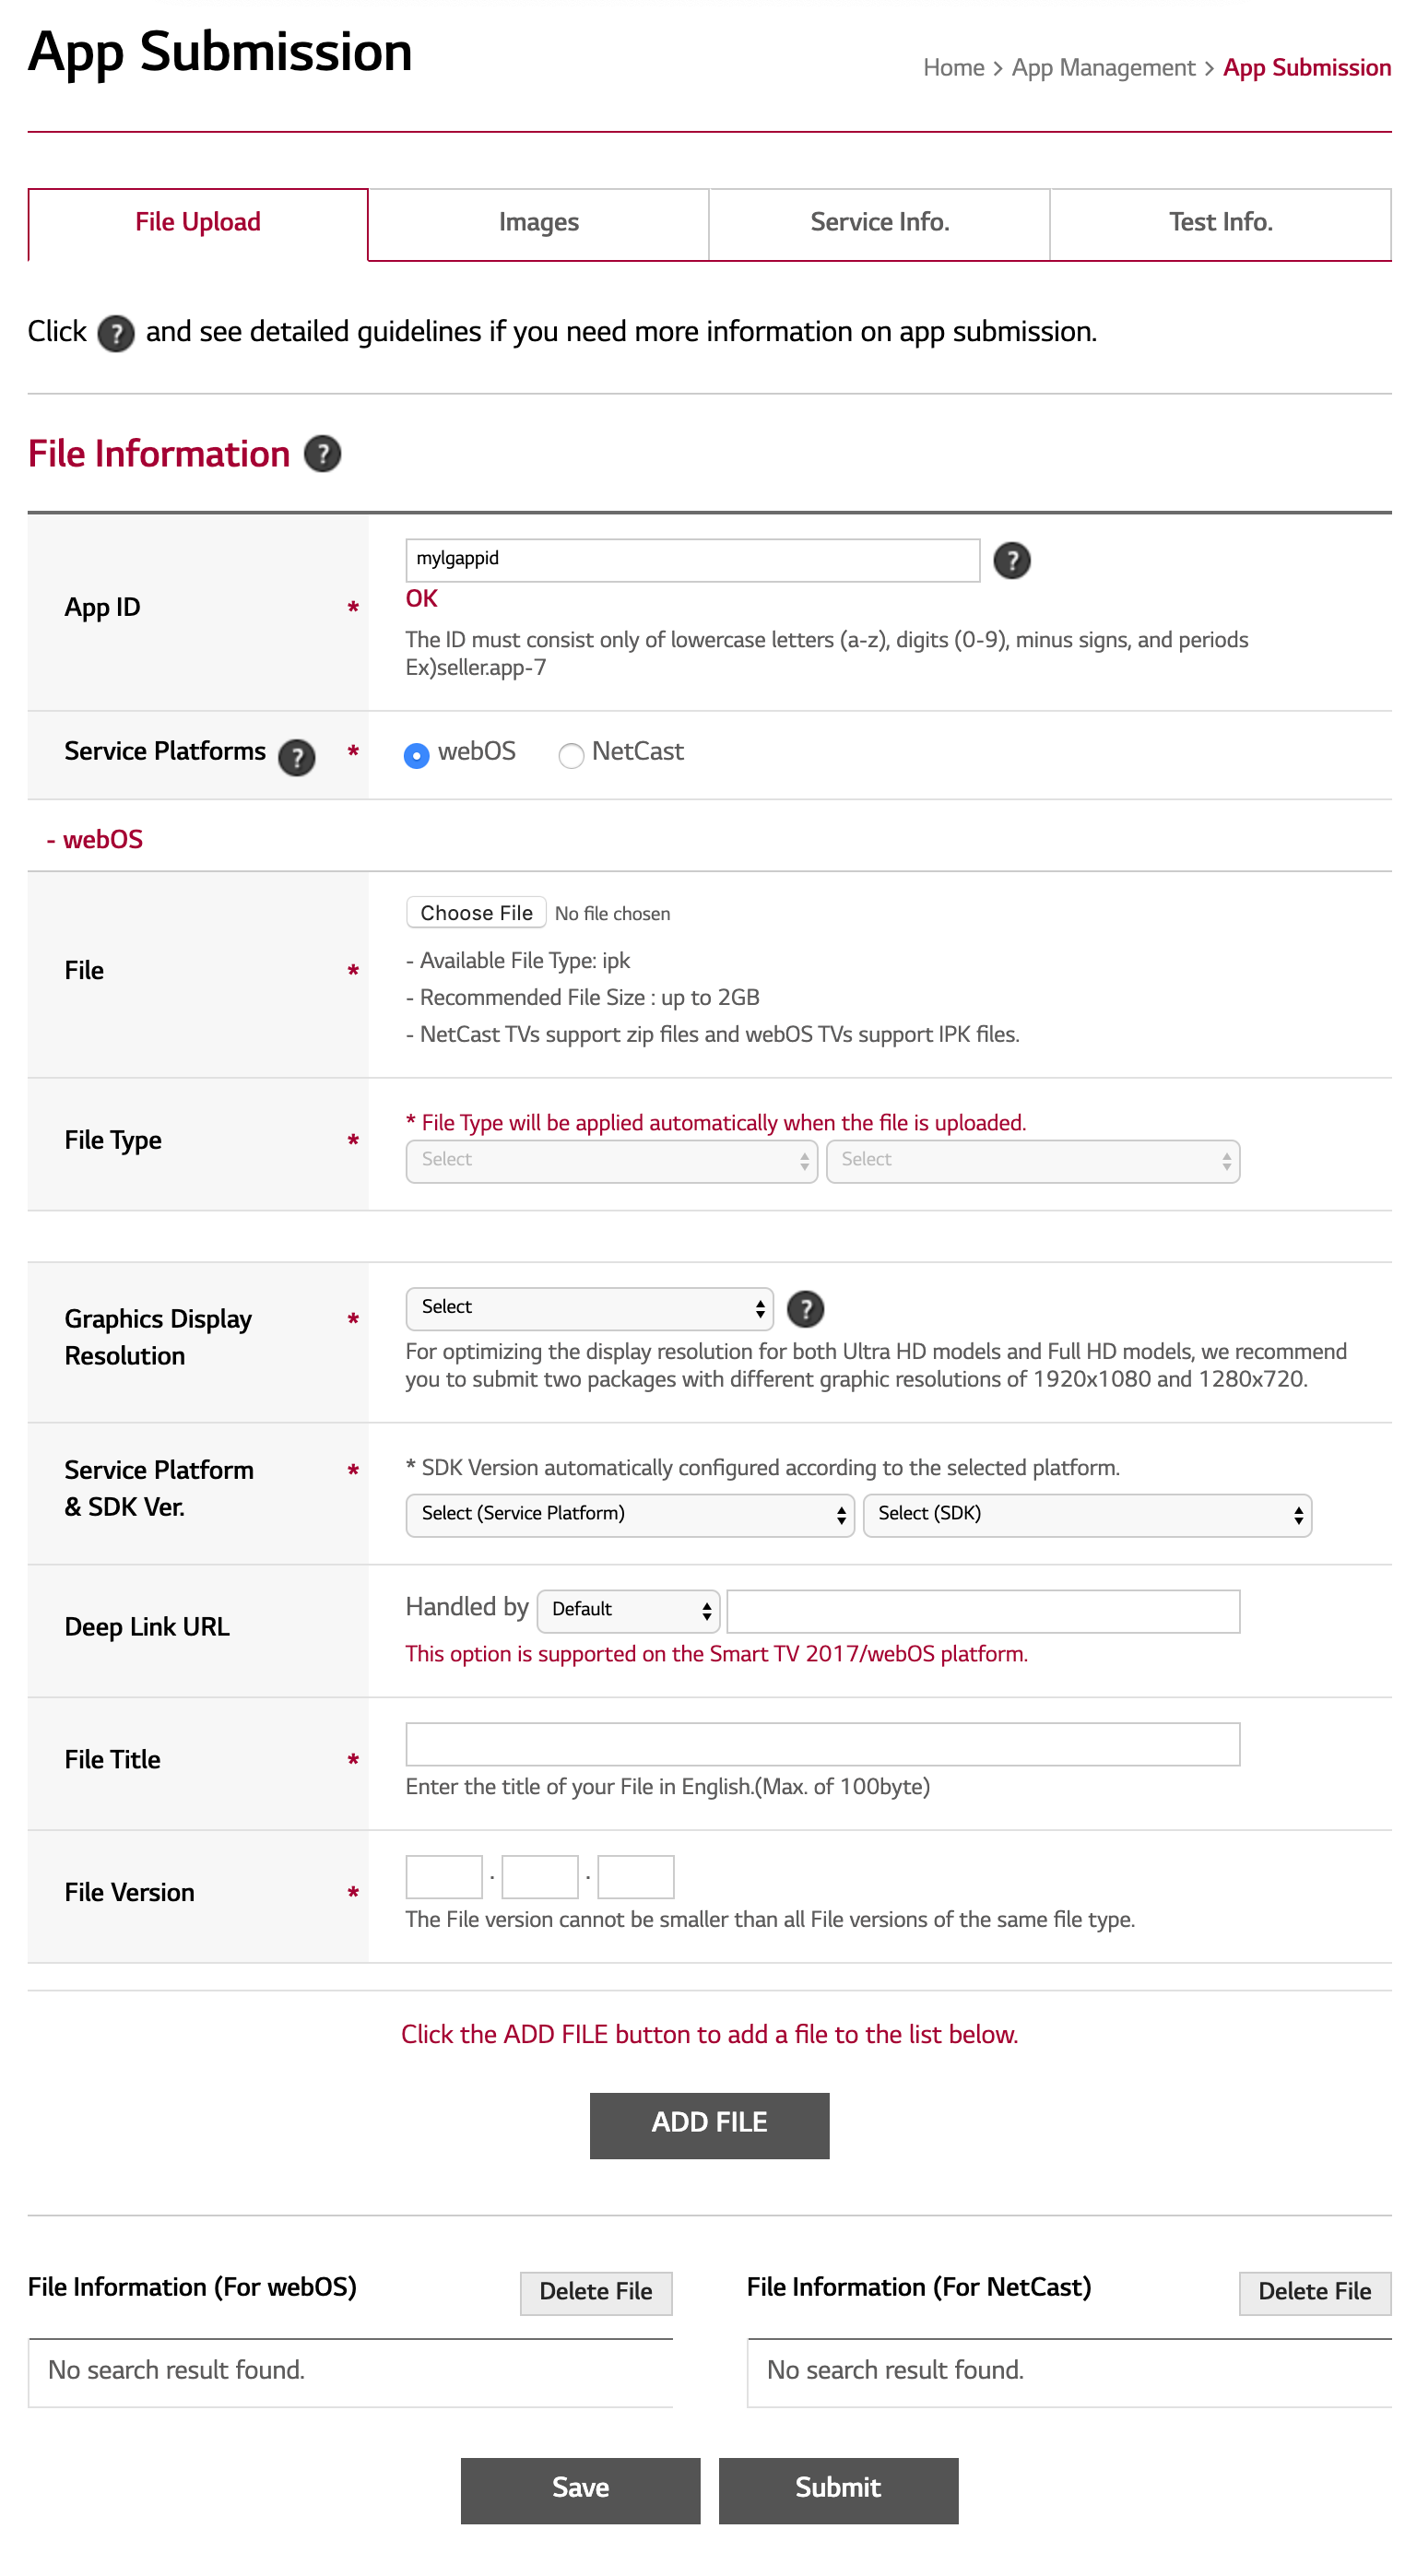
Check to be sure you see the four tabs (highlighted in yellow) where you will enter your app information.
-
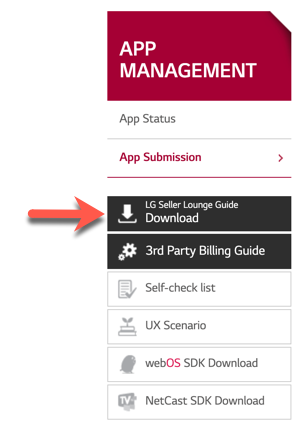
In the left navigation, click the LG Seller Lounge Guide Download button. This downloads an excellent guide to filling in the app submission forms. The PDF downloaded will be referenced later in this document.
Completing the File Upload section
In the File Upload section you will upload the ipk file that was given to you by Brightcove for the LG store. Details for this process follow:
- Enter the App ID. This is the internal name of your app. This ID cannot be changed at a later time.
-
For the Service Platforms click the radio button for webOS. At this point, a form expands for information about the file.
-
Fill in the form. Details for each field follow:
Field Description/Instructions File Click the Choose File button and upload the file provided by Brightcove File Type Automatically filled in on file upload Graphic Display Resolution Choose 1280,720 : (FHD device) Service Platform & SDK Ver. Deep Link URL First, be sure Default is selected in the dropdown; next, provide a URL where the app can be hosted for testing File Title The name of the file; you will see this listed in the SellerLounge File Version Enter the version you are assigning - Click the ADD FILE button.
- Click the Save button.
Completing the Images section
Upload the images detailed in the Required assets section of this document. The image names in that section match the names in the form.
Don't forget to click the Save button when done uploading images.
Completing the Service Info. section
To complete this section, refer to the SellerLounge Guide downloaded earlier, pages 49-52. Note that you do not enter information for the DIAL field.
Don't forget to click the Save button when done uploading images.
Completing the Test Info. section
To complete this section, refer to the SellerLounge Guide downloaded earlier, pages 53-57. The following content clarifies a few fields that may cause confusion:
-
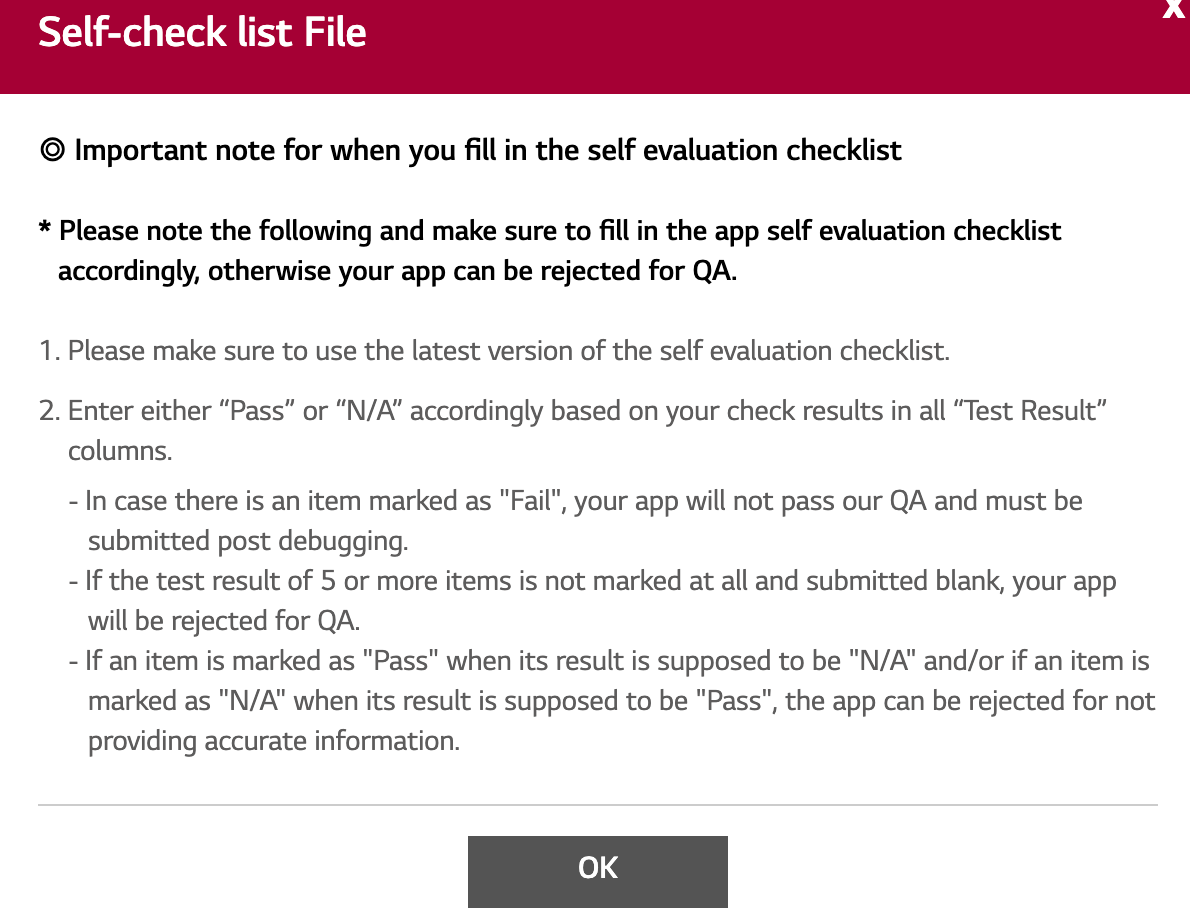
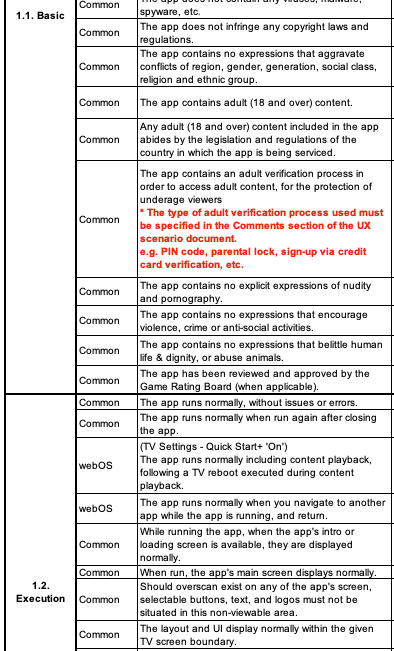
Self-check list File: This is a spreadsheet with a list of test items against which you test your app. For each item you mark it either pass or N/A.
-
Click the Template button to download the template.

-
For more information about this requirement, here is the info screen from the SellerLounge:
-
Simply for your information, here are examples of some test items.
-
Click the Template button to download the template.
-
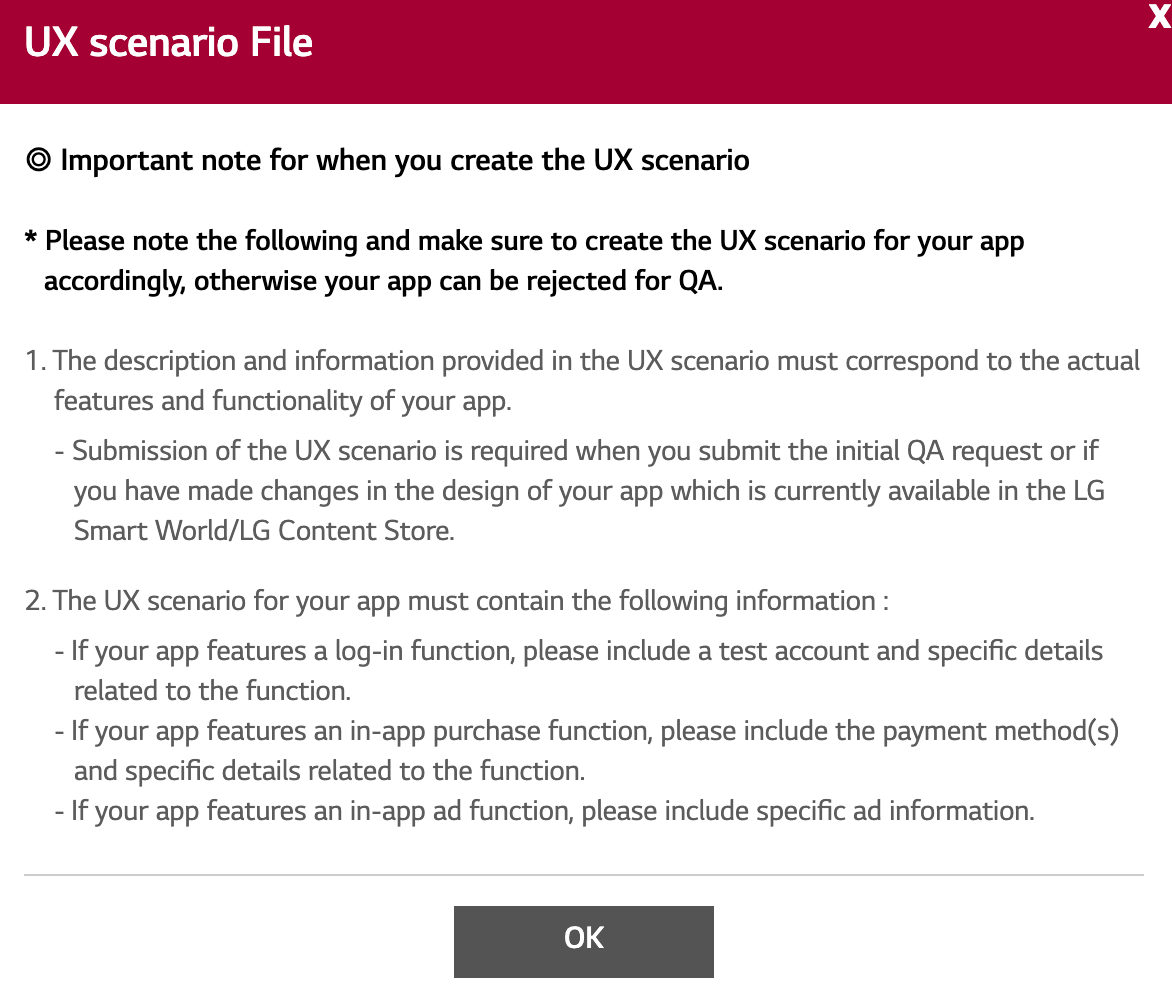
UX Scenario File: This is a PowerPoint presentation where you document expected behavior of the app.
-
Click the Template button to download the template.

-
For more information about this requirement, here is the info screen from the SellerLounge:
-
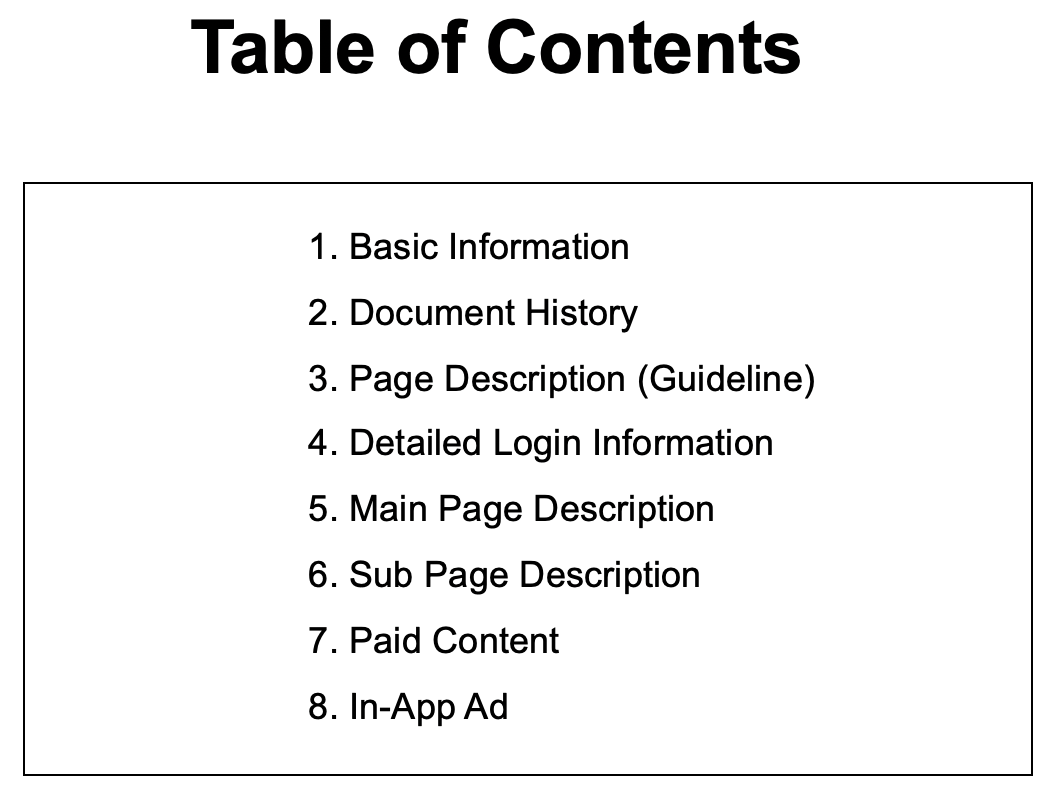
Here is the list of areas for which you must document expected behavior.
-
Click the Template button to download the template.
Don't forget to click the Save button when done uploading images.