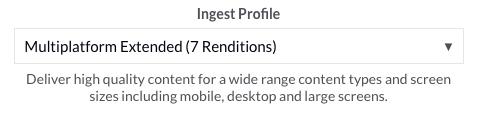
Screencasts are digital recordings of a computer screen, and can include elements such as audio narration, slide presentations or other media. Screencasts are a cost-effective way of providing engaging videos to train end users and customers. When creating a screencast, these five steps are usually followed:
There are a variety of screen capturing tools available for both Windows and Mac platforms. Some of the more popular titles are:
There are many websites that offer reviews of these products. Also, most vendors offer trial versions so you can download their software and see which one best meets your needs. We are often asked which software was used for our training videos. These were created using Camtasia and are hosted on our Brightcove Gallery site.
Before you get started with your screencasts, here are a few things to consider.
Below is a set of useful tools and utilities that you may find useful as you edit and publish your screencasts:
Below are some tips that may save you time when recording a screencast:
After you have recorded and edited your screencast, you need to export it. Most screencasting software offers a host of both predefined and custom settings that can be used for exporting your screencast. Export settings will vary depending on the complexity of the screencast content and the expected connection speeds of the audience. We have found that the following export settings provide a quality screencast:
Again, the above settings are recommendations and you may need to alter your settings to provide a quality viewing experience to your viewers. If your video is pausing, or if you want to keep the bandwidth requirements lower, you can export at 15fps as this will help keep the bit rate low. The one exception to this is if your video also includes live action video.
We recommend that after exporting your video you use one of the useful tools to check the video bit rate. Remember that the number of renditions created is based on the bit rate of your source file.
The ingest profile you select in {{ site.product_short }} will have an effect on the quality of your published screencast. Keep in mind that creating more renditions is not always a good thing. Having multiple renditions with different sizes and bit rates may cause the end user to see a version of your screencast that is pixelated or has blurry text due to the video being resized. Preserving the resolution is key to delivering a legible and clear screencast.
The Dynamic Delivery profiles provided by default in the Upload module provide the option of creating an MP4 rendition. You should create MP4 renditions if you want viewers to be able to download videos or if you will be sharing videos using Brightcove Social. MP4 renditions may also be required to generate video captions. For example, our partner 3Play Media requires that videos have an MP4 rendition in order for captions to be generated.
Depending on your {{ site.product_short }} subscription, you may choose to create a custom ingest profile to remove some of the lower quality video renditions. For specifics on the standard ingest profiles, see the Standard Ingest Profiles for Dynamic Delivery and Context Aware Encoding topic. For information on creating customized ingest profiles, see Creating Ingest Profiles for Dynamic Delivery.