Overview
An SVOD Plan defines how a particular set of videos can be purchased by your apps' customers. The SVOD plan must be created in Brightcove Beacon Classic, and is detailed in the Creating an SVOD Plan document. {% if site.product_short == "Beacon Classic" %} Also crucial in the use of the SVOD plan are the Video Cloud custom fields created for videos in a Video Cloud account, as detailed in the Creating Video Cloud Custom Fields document. Specifically, the Rights Management fields are be used. {% endif %}
Assigning plans in Beacon Studio
You can use the Beacon Studio to associate SVOD plans with media content.
These steps walk through adding a SVOD plan to a movie, but the process is similar for other asset types.
-
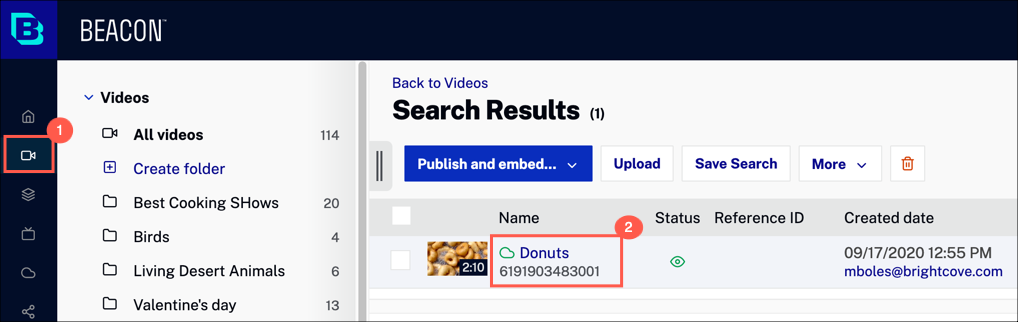
Login to Beacon Studio and select a video.
- In the left navigation, select Media
- Click on the Name of a video
-
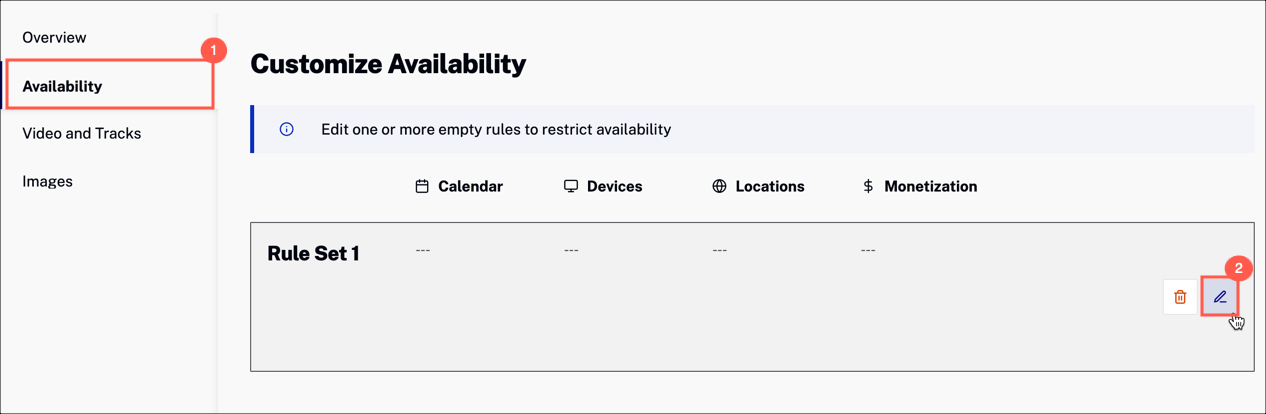
Select Availability and either edit or create a Rule Set.
-
Scroll down to the Monetization section.
- Expand the Monetization dropdown menu and select SVOD
-
Enter the SVOD plan name. You will have created this in Beacon Classic.
To learn how to create SVOD plans, see the Creating an SVOD Plan document.

- Click Save.
Understanding the rights management custom fields
The rights management custom fields consist of:
- beacon.rights.<counter>.type
- beacon.rights.<counter>.startDate
- beacon.rights.<counter>.endDate
- beacon.rights.<counter>.devices
- beacon.rights.<counter>.locationsPermit
- beacon.rights.<counter>.locationsDeny
- beacon.rights.<counter>.packageName
- beacon.rights.<counter>.adConfiguration
First consider the <counter> part of each name. This is included as you may wish to create multiple sets of rights management fields, and the <counter> is utilized so you can use array type syntax to group associated fields.
For instance, say you wanted to create SVOD plans around holidays and have packages for:
- Earth Day
- Arbor Day
- New Years
You must go into Video Cloud and create three sets of rights management fields, using counter values of 0-2 (or 1-3 if you prefer) that would appear as shown here:
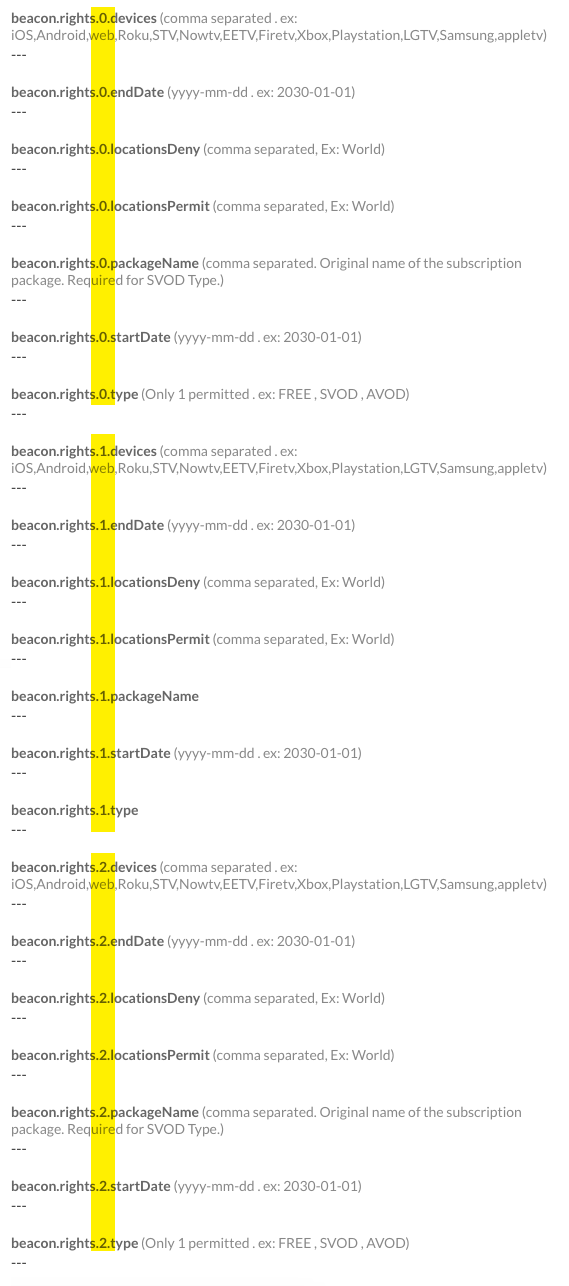
To summarize, for each package you wish to use that uses a different configuration, such as devices, time, location, etcetera, you need to create a new "counter" set of rights management fields. Otherwise, you can add to the same rule all the SVOD package needed.
Package and custom field similar rights
Some custom fields to which you can assign data, and have applied to a video when ingested, can seem the same as form fields when creating your package in Brightcove Beacon. For example, the custom field beacon.rights.<counter>.locationsDeny and the package's Denied locations form field may seem like they could be in conflict. Remember, when considering these "conflicts" there are two different questions being asked, those being:
- Do the rights on the video allow it to play?
- Is a user allowed to subscribe to the package?
Consider these scenarios:
- An end date in the beacon.rights.<counter>.endDate custom field is later than the end date of the package itself. This means the video's rights would allow it to be viewed until the custom field end date, but the user could not subscribe to the package that may have, for example, lowered the cost of viewing the video.
- A package is created that has permitted locations of US, Canada and Mexico, and that package is assigned to the video in the custom field beacon.rights.<counter>.packageName. Also in the video's custom fields, UK is placed in the beacon.rights.<counter>.locationsPermit custom field. The package is assigned to the video, but the package cannot be purchased in the UK. The video would be able to play in the UK, but it would could not be part of the package for a UK customer.
- A package is created that has permitted locations of US, Canada and Mexico. In the custom fields US and Canada are added in the video's beacon.rights.<counter>.locationsDeny custom field. Here the customers in US, Canada and Mexico could subscribe to the package, but the specific video where US and Canada are denied locations means the video could not be viewed by customers in those locations even though the video is in the package.
Subscription interval support
The following table shows the time intervals supported for recurring subscriptions for each store:
| Time Interval | Apple Store | Google Play Store | Roku Store | Amazon Store | Stripe |
|---|---|---|---|---|---|
| 1 Week | Yes | Yes | Yes | Yes | |
| 1 Month | Yes | Yes | Yes | Yes | Yes |
| 3 Months | Yes | Yes | Yes | Yes | |
| 6 Months | Yes | Yes | Yes | Yes | |
| 1 Year | Yes | Yes | Yes | Yes | Yes |
Assigning a single video to a package
To assign a single video to a package you must use Video Cloud Studio. Perform the following steps:
- In Studio, navigate to the Media module.
- Click on the video's title you are adding to the package to see that video's properties.
-
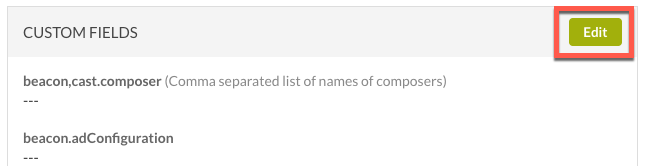
Scroll down until you see the Custom Fields section on the right hand side and click the Edit button.
-
Place the name of the SVOD plan created in Brightcove Beacon in the
beacon.rights.<counter>.packageNamefield. -
Since you are using a package, you MUST set the
beacon.rights.<counter>.typeto SVOD.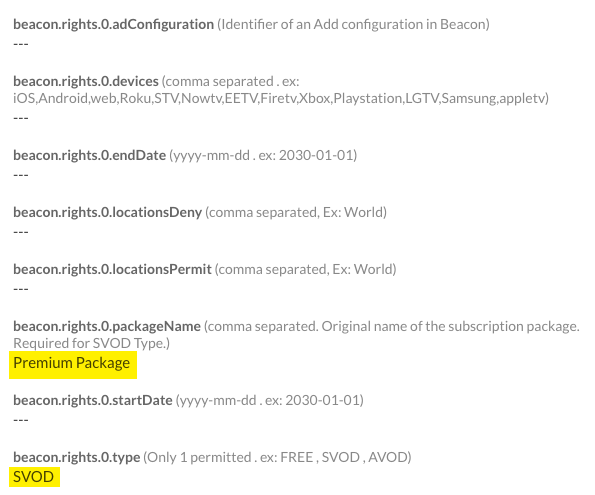
- Scroll to the bottom of the list of custom fields and click the Save button.
Assigning multiple videos to a package
To assign multiple videos to a package you must use Video Cloud Studio.
The following screenshot is helpful when performing the steps:
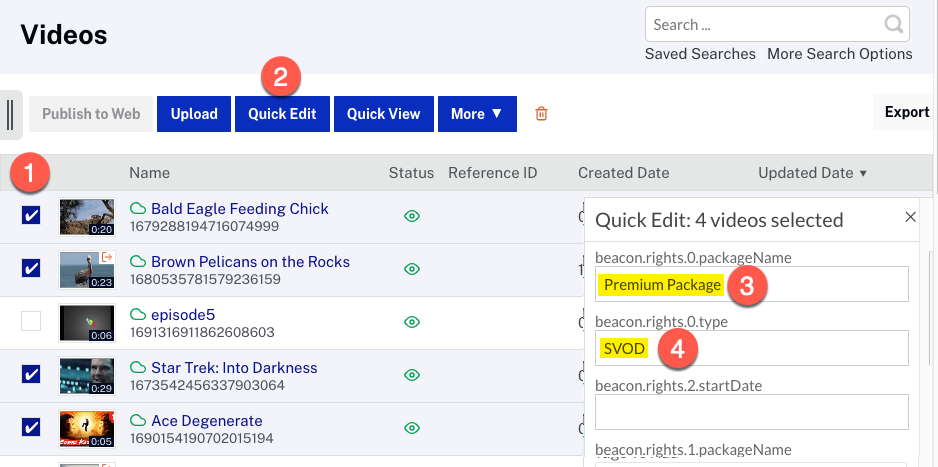
- In Studio, navigate to the Media module and check the checkbox in front of each video you wish to add to the package.
- Click the Quick Edit button.
-
The Quick Edit section appears on the right side of the screen, and there you can place the name of the SVOD plan created in Brightcove Beacon in the
beacon.rights.<counter>.packageNamefield. -
Since you are using a package, you MUST set the
beacon.rights.<counter>.typeto SVOD. - At the bottom of the Quick Edit section, click the Save button.
The videos are automatically be ingested into Beacon.
{% endif %}Ingesting the videos into Brightcove Beacon
You now have associated one or videos with your SVOD plan. You now have to ingest those associations into Brightcove Beacon. To do this, follow these steps:
- Log in to Brightcove Beacon.
- Click on the wrench icon (Tools).
- From the left side navigation click Ingestion.
- Click the Update Brightcove Videos button.
- If any errors are reported, check those to be sure none are related to your SVOD plan.
- If you wish to have the new associations immediately active in Brightcove Beacon, you must clear the current cache. To do this, from the left side navigation click Cache, then click Cache Purge.
For more details on the actions taken in this section, see the Using the Tools document.
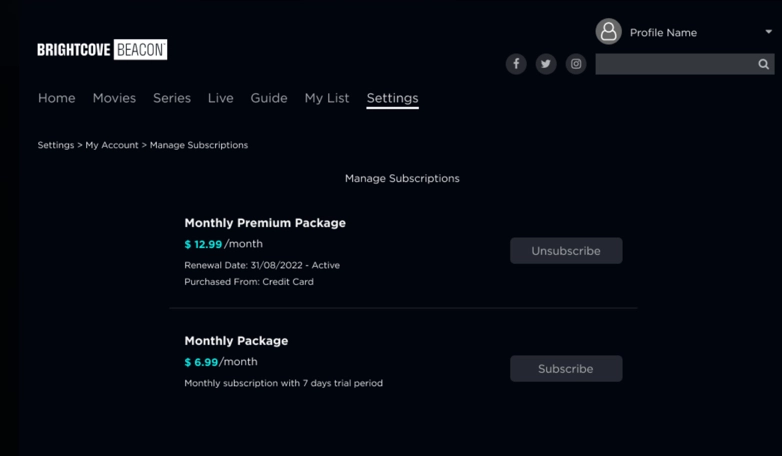
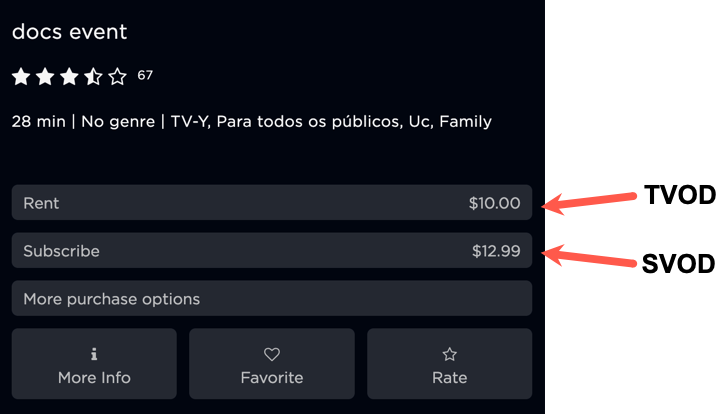
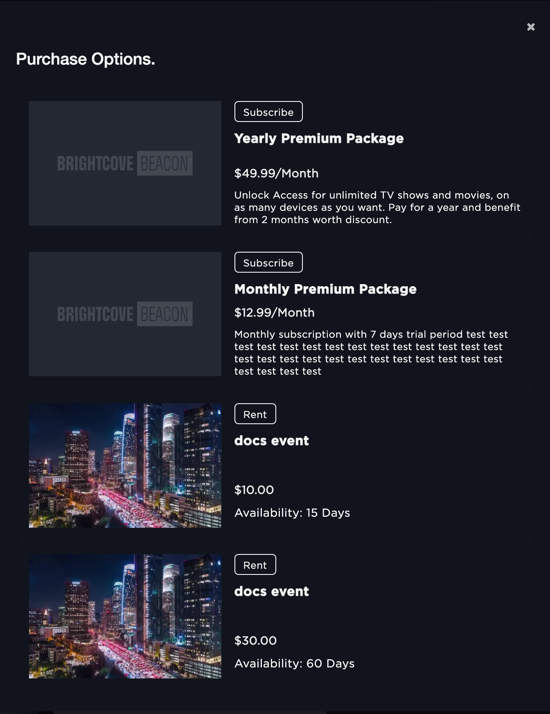
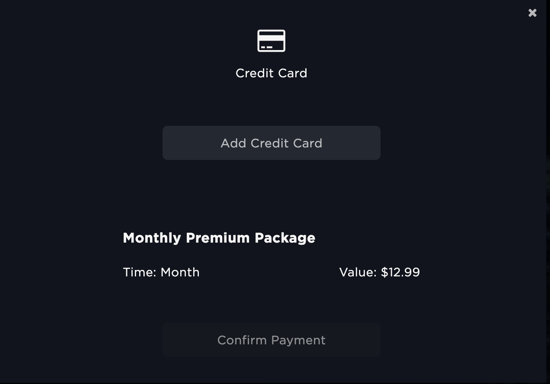
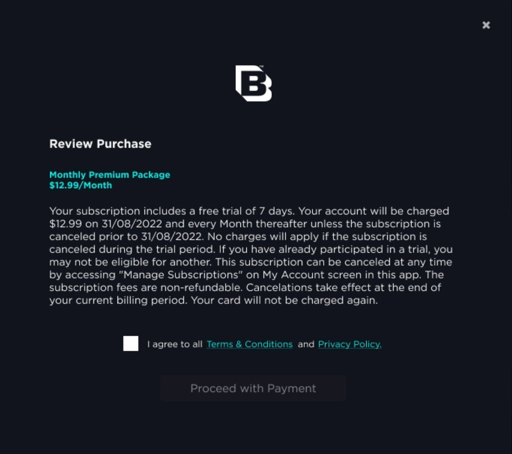
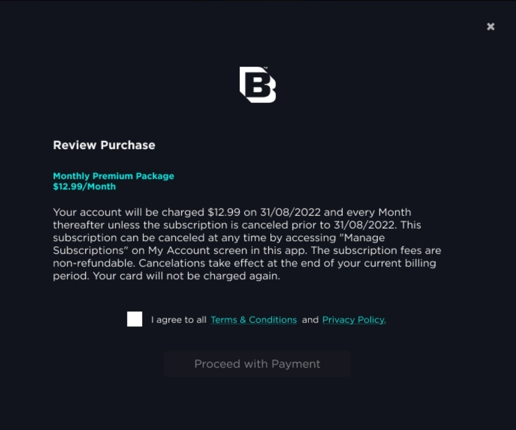
How SVOD appears in the apps
The following screen shots show how SVOD implementations appear in a Brightcove OTT web app. The look is similar for other platforms.
- SVOD and TVOD options for an asset - Viewer must be authenticated to see these options
- More purchase options dialog
- Confirm payment for subscription/purchase
- Review SVOD with trial
- Review SVOD without trial
- After completing purchases, viewers can manage their subscriptions in the Settings section.