Introduction
By default, live streams talk to the Brightcove Live API to stream your channel. A new system to manage Playback Rights and Restrictions sits in front of the Live API and provides playback authorization using DRM licenses.
Live streams use runtime restrictions, so you will need a JSON Web Token (JWT) with specific permissions (claims) for your stream request.
The token is used when requesting the video license, once the video has been loaded to the player and the source has been selected.
To use Playback Restrictions with live streams, your account must be enabled for studio-grade DRM.
If you are not familiar with this feature, see the Overview: Brightcove Playback Restrictions document.
Requirements
This feature is a paid add-on for your account. Contact your Customer Success Manager to enable the following:
- Enable your account for DRM.
-
Enable your account for Playback Rights (EPA).
Workflow
To use Playback Restrictions with a live channel, follow these steps:
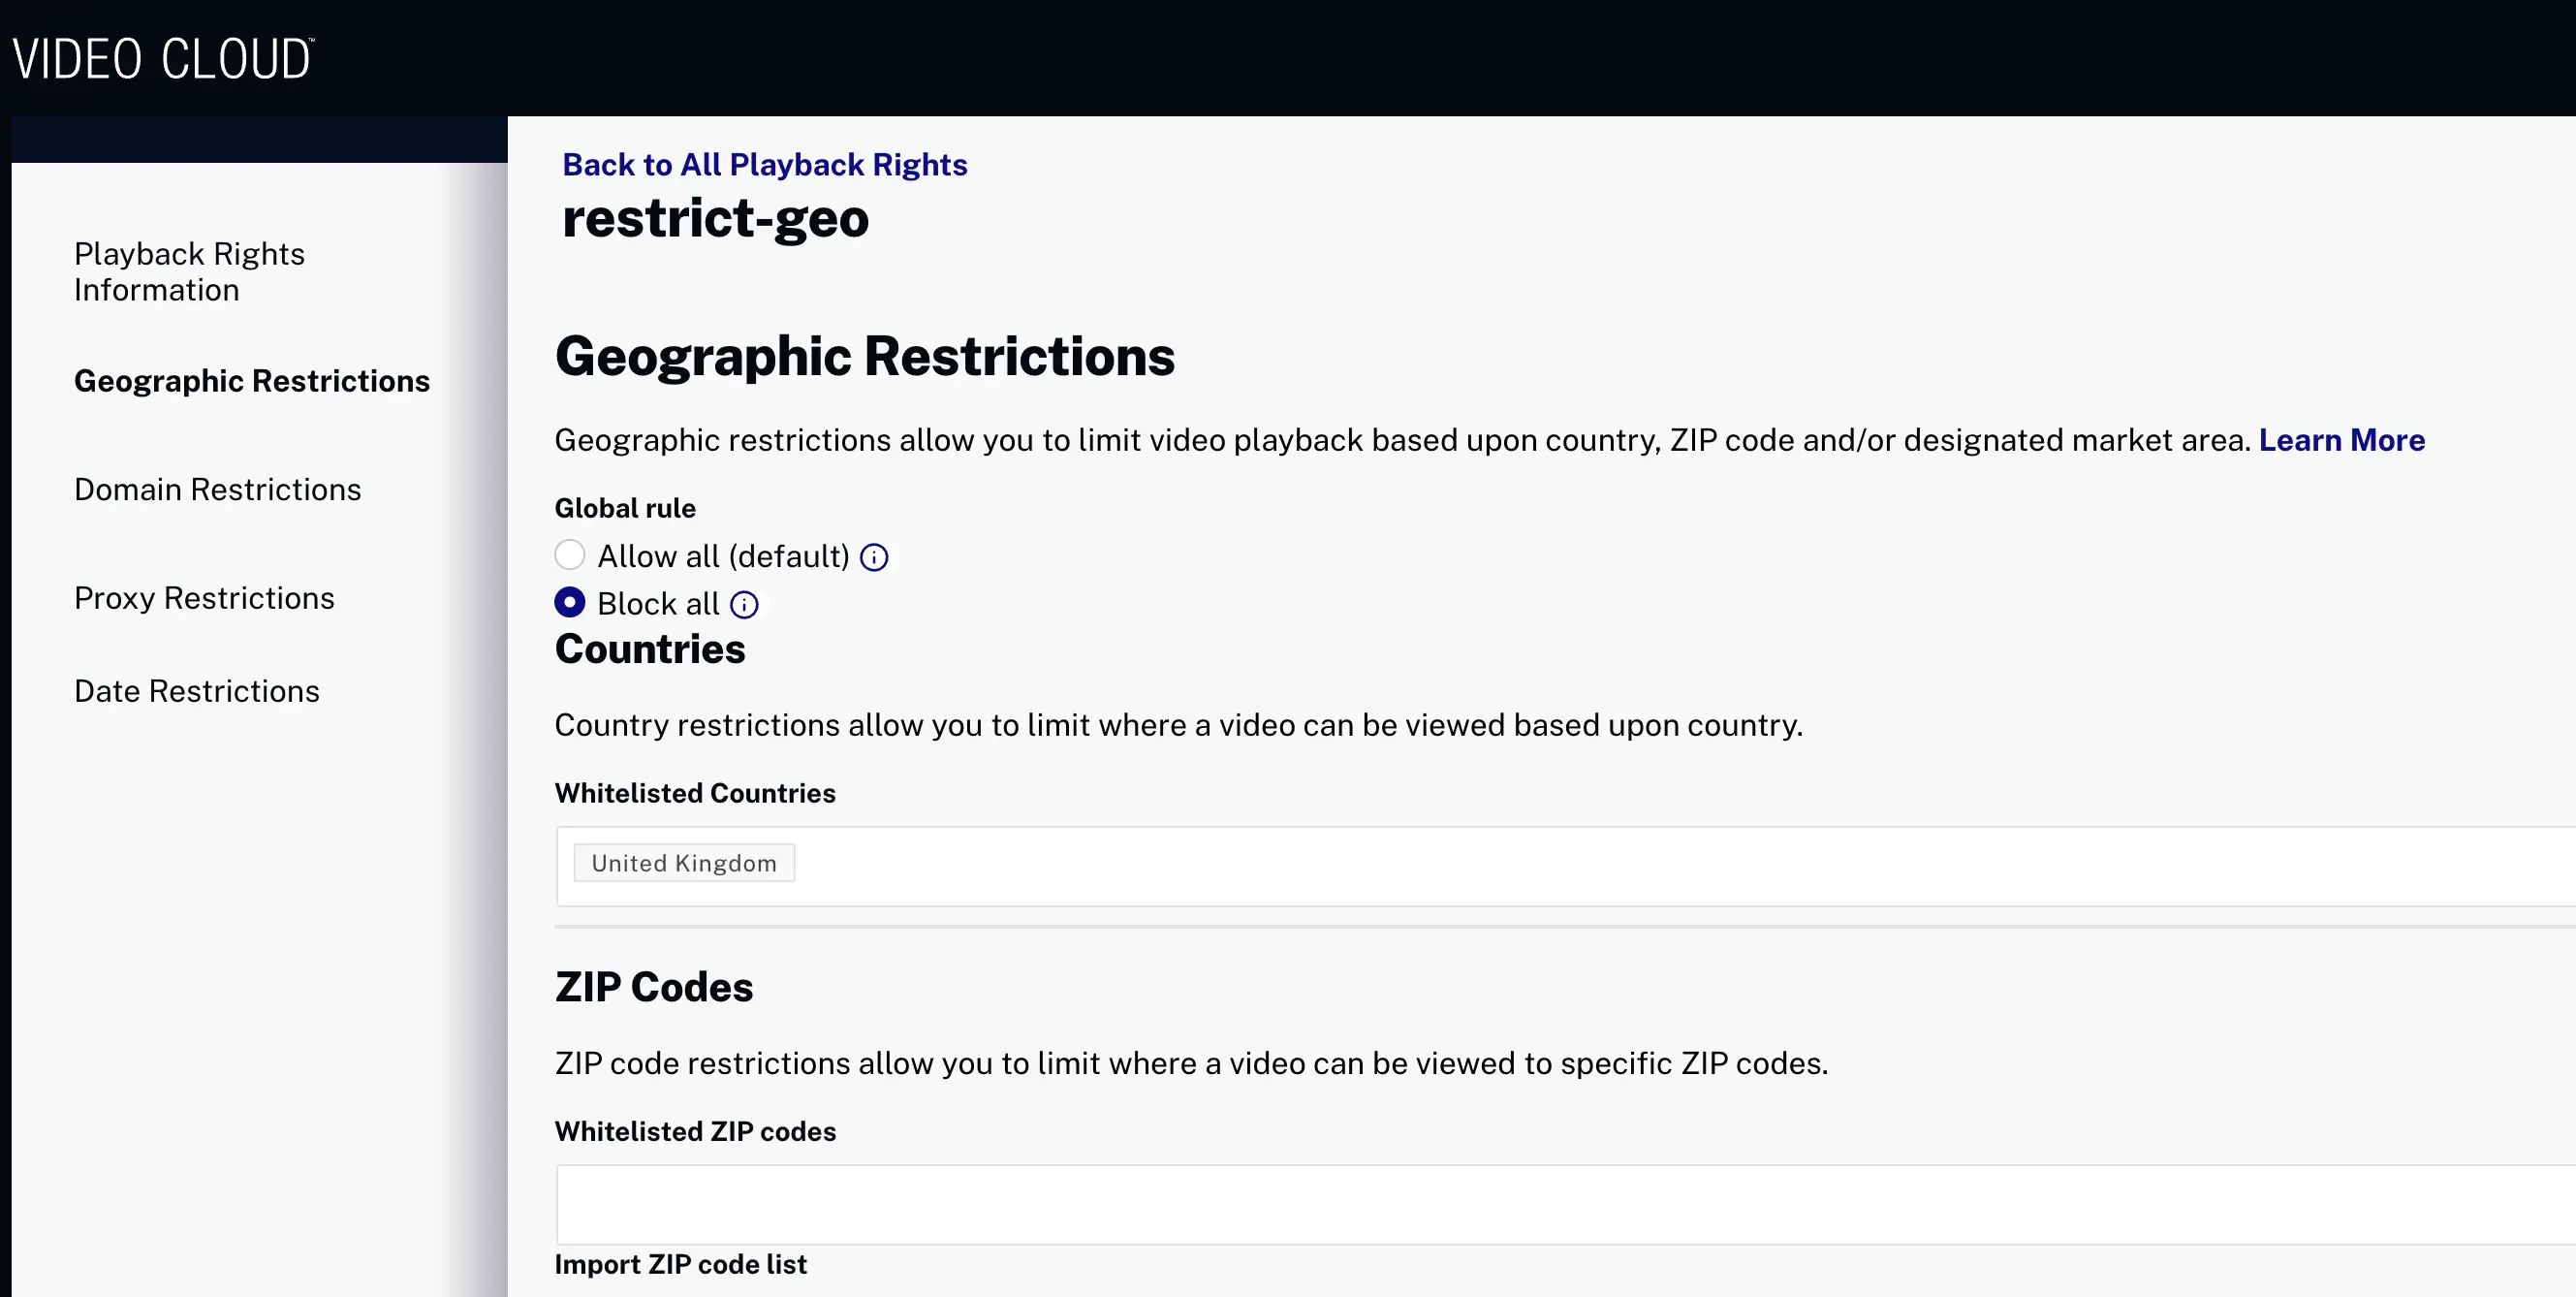
Define Playback Rights
Brightcove's Playback Rights Management Service allows you to manage video playback based on the following:
- Geography
- Domain
- Proxy
- Schedule dates
Here are the steps to define Playback Rights in Studio:
- Review the validation diagrams for Playback Rights in the Implementing Playback Rights document.
- In Studio, in the primary navigation click Admin > Playback Rights.
- To create a new right, click .
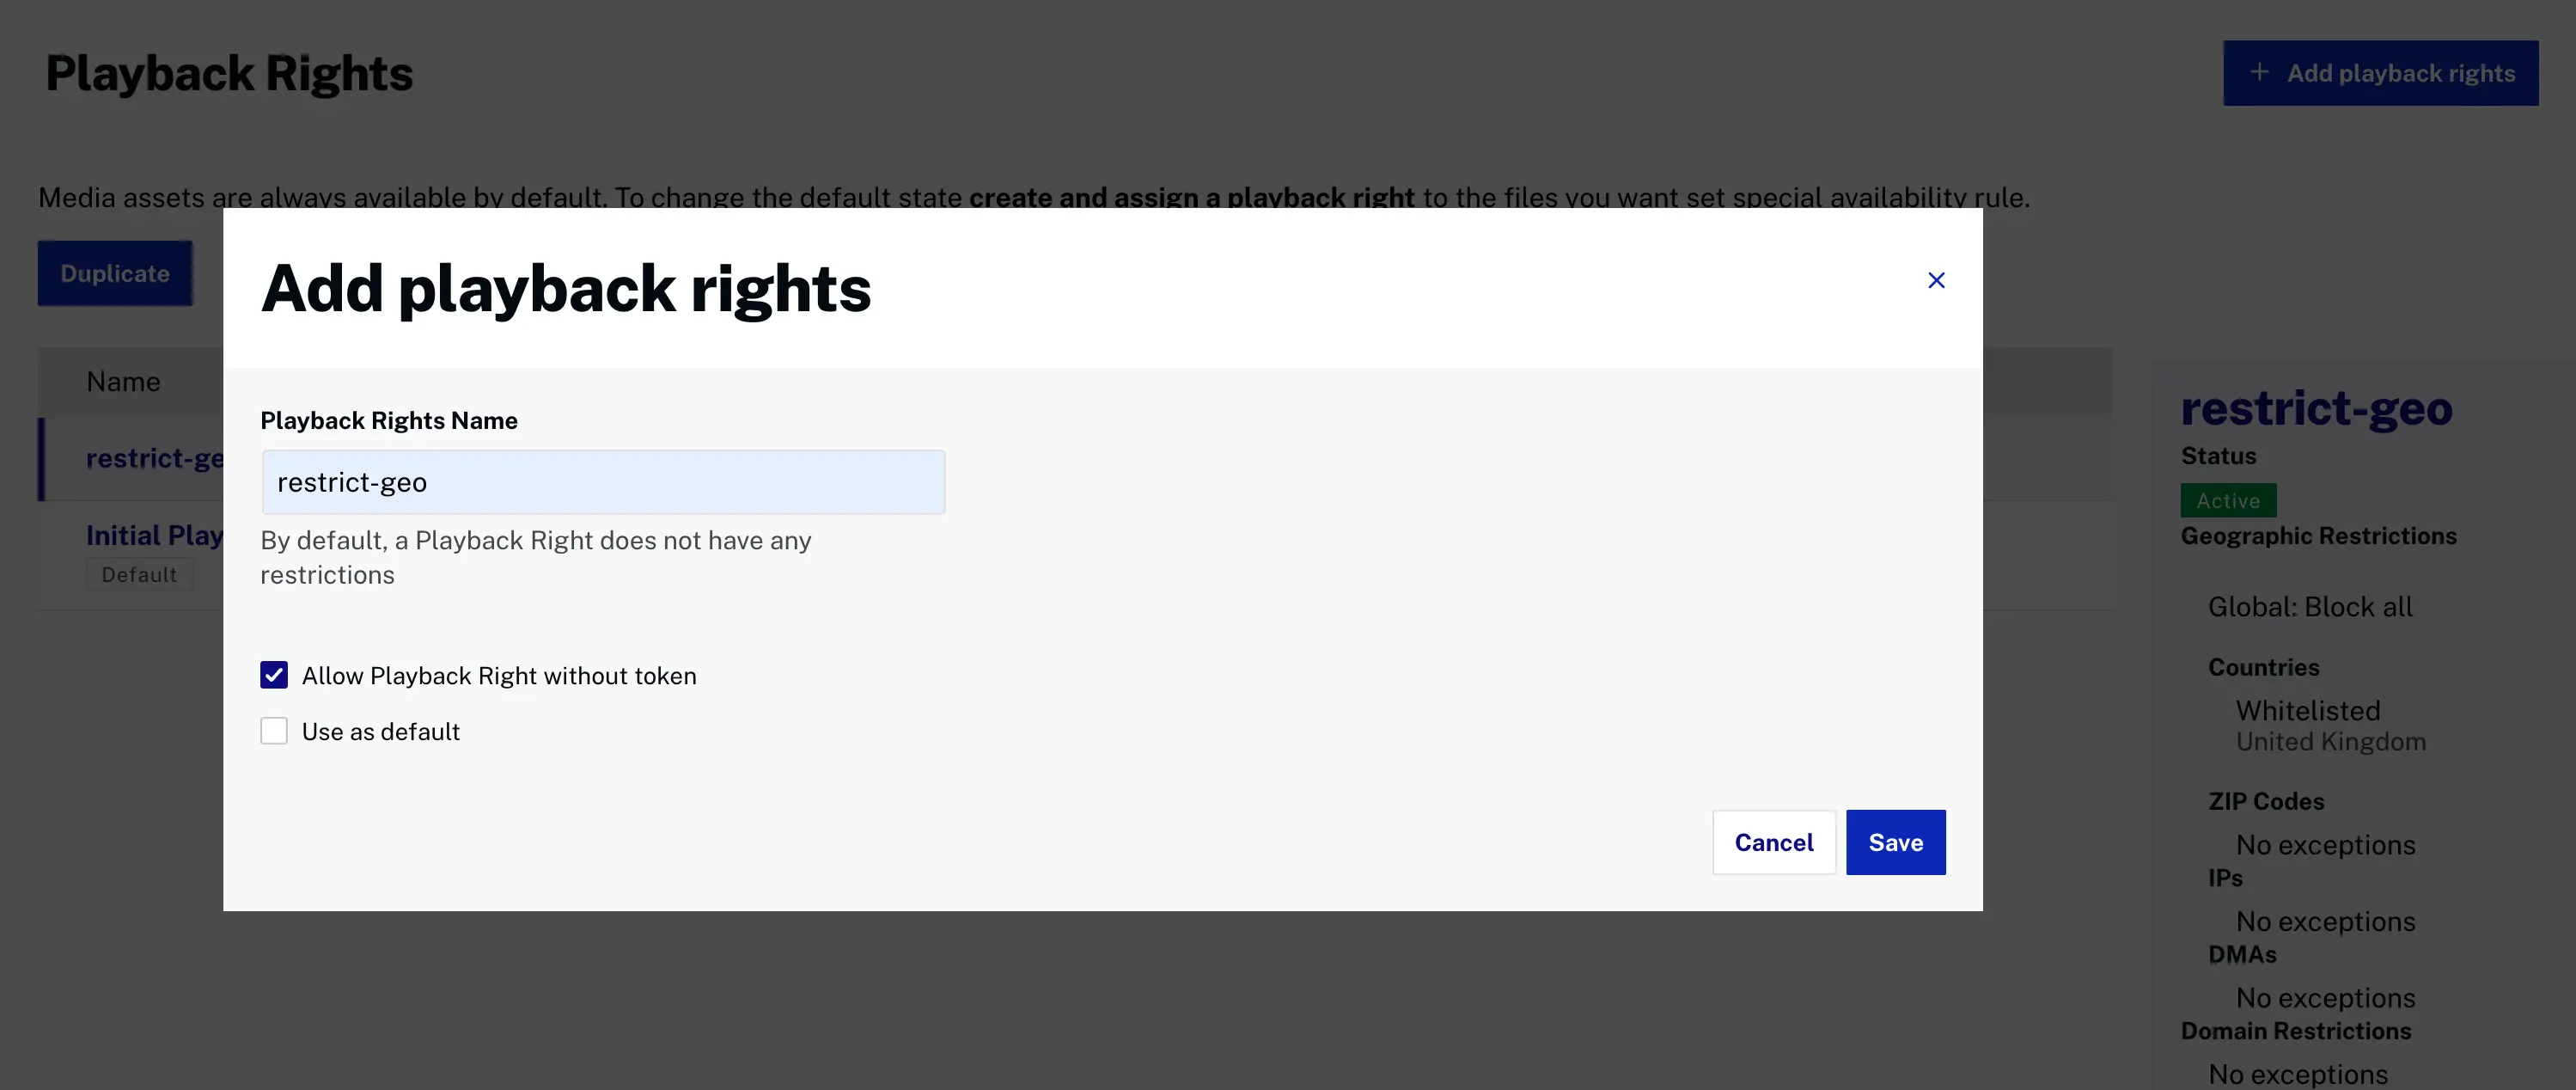
- Add a Playback Rights Name and click .
- In the left navigation, select each category and edit changes.
- Click .
- To edit a Playback Right, click on the Name of the Playback Right and it will open the Playback Right details page.
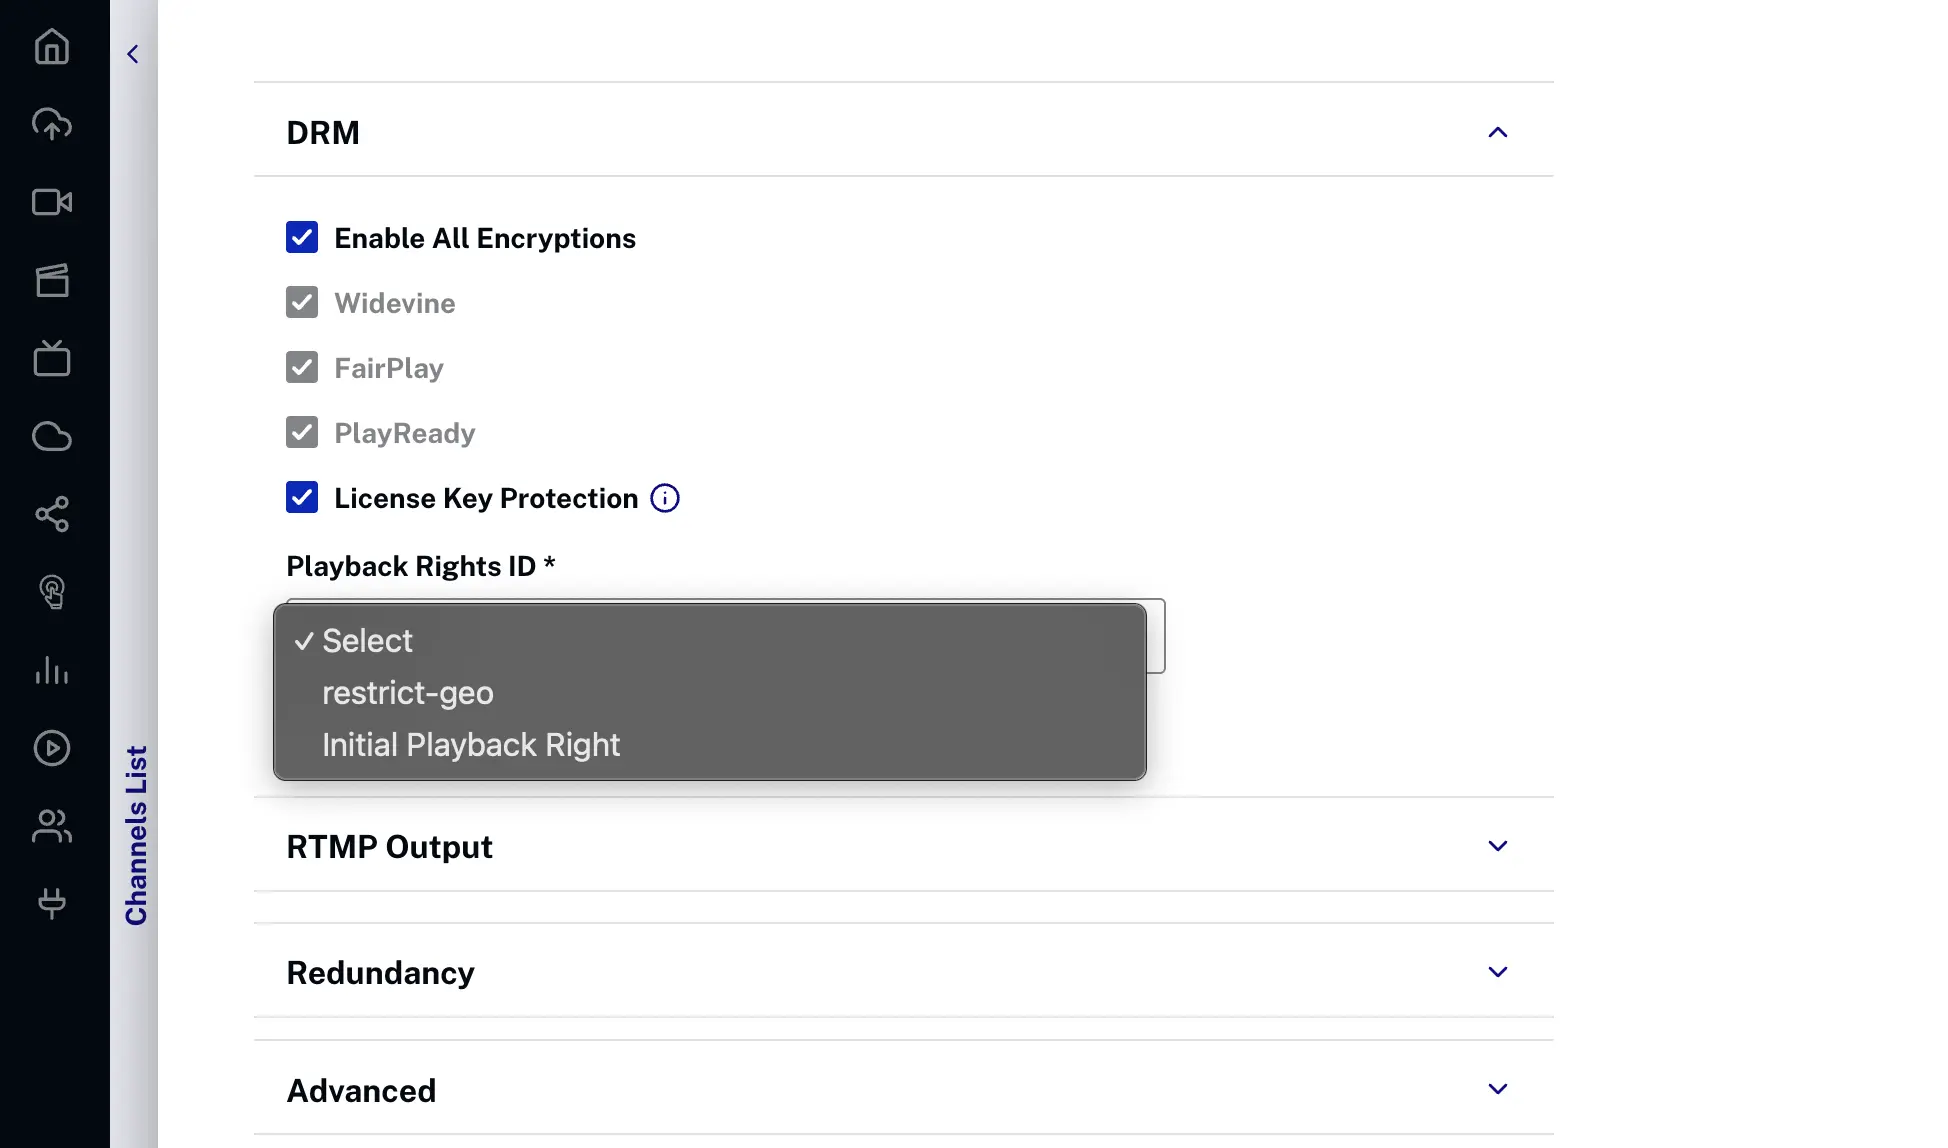
Create a live channel with Playback Restrictions
Use the Live module to create a live channel with Playback Restrictions and associate a defined Playback Right directly from the Live UI.
To create a Live Channel, follow these steps:
- Open the Live module.
- From the Live Channels page click .
- Enter the channel data as needed. For details, see the Creating and Managing Live channels using the Live Module document.
- Expand the DRM section.
- Enable all encryptions, or select a specific encryption mode (Widevine Modular, FairPlay or PlayReady) depending on your needs.
- To use Playback Restrictions, select License Key Protection. and choose the Playback Rights you defined in the Define Playback Rights section.
- Enter any additional channel details.
- Click .
- Start streaming your live channel. For details, see the Start Streaming section on the page.
Publish the live channel
Live streams with Playback Restrictions require a JSON Web Token (JWT) with specific permissions (claims) for your stream request.
To publish a live stream with Playback Restrictions, follow these steps:
-
Create a JSON Web Token (JWT) and register the public key with Brightcove.
For details, see the Creating a JSON Web Token (JWT) document.
- In Studio, return to the Live module.
- In the left navigation, select Publish and Embed.
- In the Live Player Options section, select your player configured in the previous step.
-
Copy the Advanced Embed Code and paste it into your HTML page.
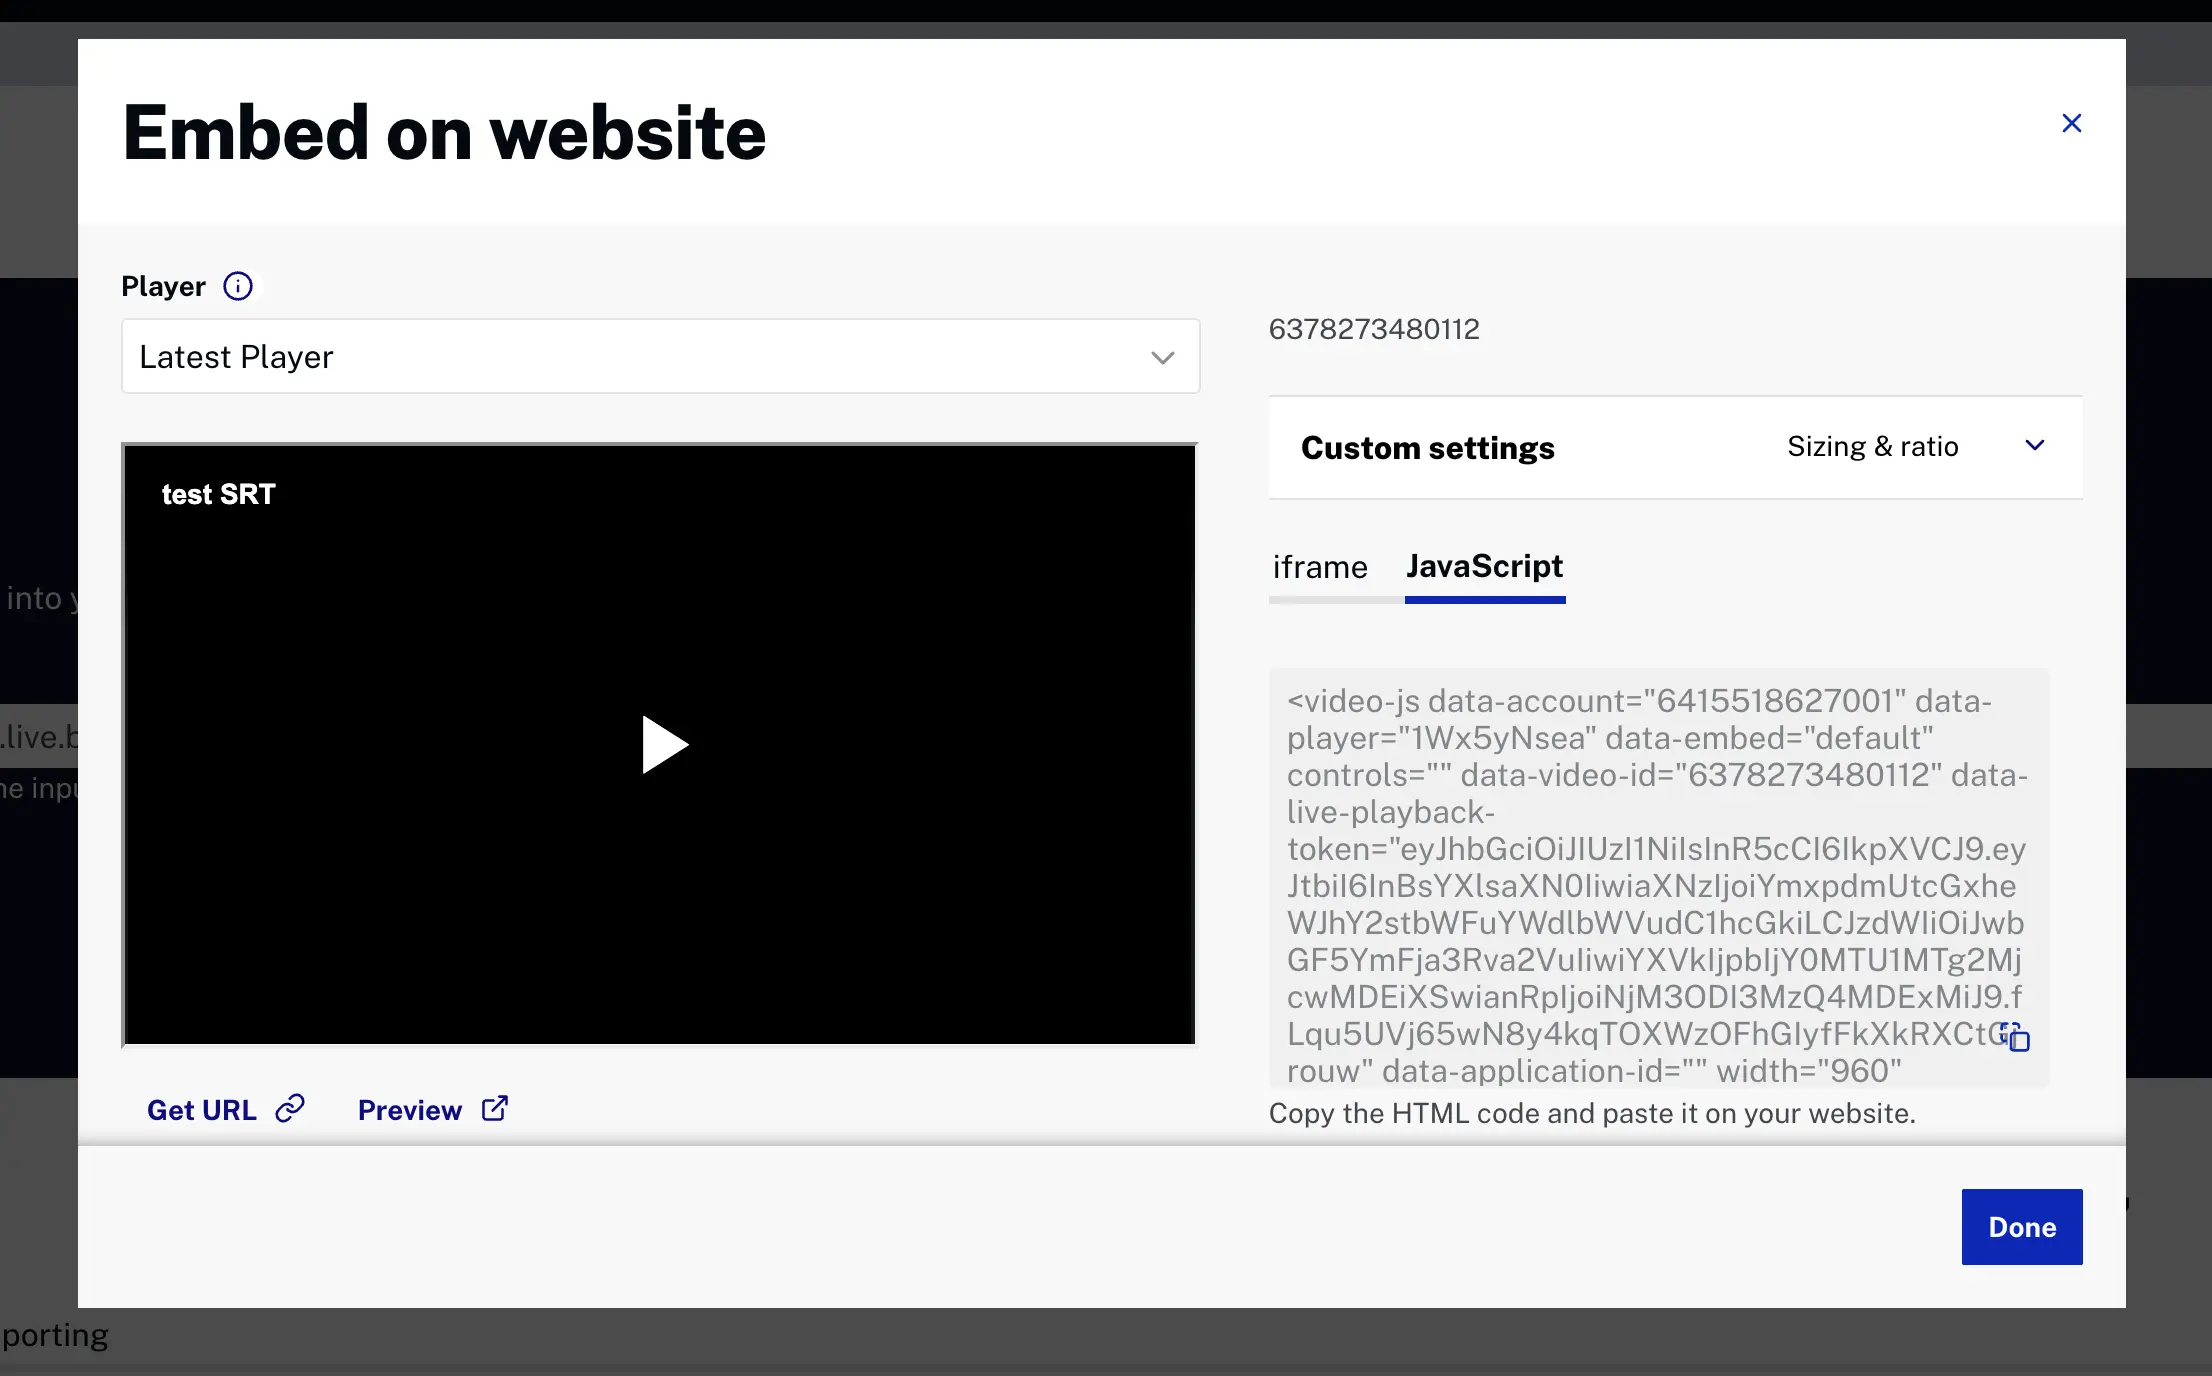
- Create a custom script with the Advanced embed code.
The JWT token is passed with the playback request. If the token is invalid or expired, access to the content will be restricted. The player must be configured to use the token.
To configure the Brightcove web player, see the Playback Restrictions with Brightcove Player document.
- Confirm playback in your web page.
- Confirm that playback can be blocked by changing the settings for the Playback Right assigned to the channel (live channel).