Implementing Server-Side Ad Insertion in NextGen Live (SSAI)
Learn how to implement Server-Side Ad Insertion (SSAI) in NextGen Live, including channel creation, ad configuration, SCTE-35 insertion, and publishing workflows.
Introduction
NextGen Live supports Server-Side Ad Insertion (SSAI), allowing server-side ads to be requested and displayed during live streams. SSAI provides several key advantages for live streaming:
Ad blocker resistance: Since ads are stitched into the live video stream on the server side, they are not affected by ad blockers
Seamless integration: Ads are inserted at cue points sent from your encoder or created manually using the Live module
Fill slate support: Configure fill slates to handle unused ad time
SCTE-35 support: Industry-standard signaling for ad insertion
After completing this guide, you should be able to:
Create NextGen Live channels with SSAI enabled
Configure ad settings and fill slates
Insert SCTE-35 cue points for ad breaks
Publish SSAI-enabled live streams
Monitor and manage ad insertion during live channels
Audience
Broadcasters and content creators who need to implement server-side advertising in their NextGen Live streams.
Prerequisites
An account with NextGen Live access and SSAI enabled
A valid ad tag URL from your ad server
Configured server-side ad settings in the Admin module
Understanding of SCTE-35 signaling (for automated ad insertion)
Configuring Server-Side Ad Settings
Before implementing SSAI in NextGen Live, you must configure server-side ad settings that define ad playback behavior, including ad calls, timing, beacons, and other configuration options.
Navigate to the Admin module in Studio.
In the left navigation, click NextGen Live Settings.
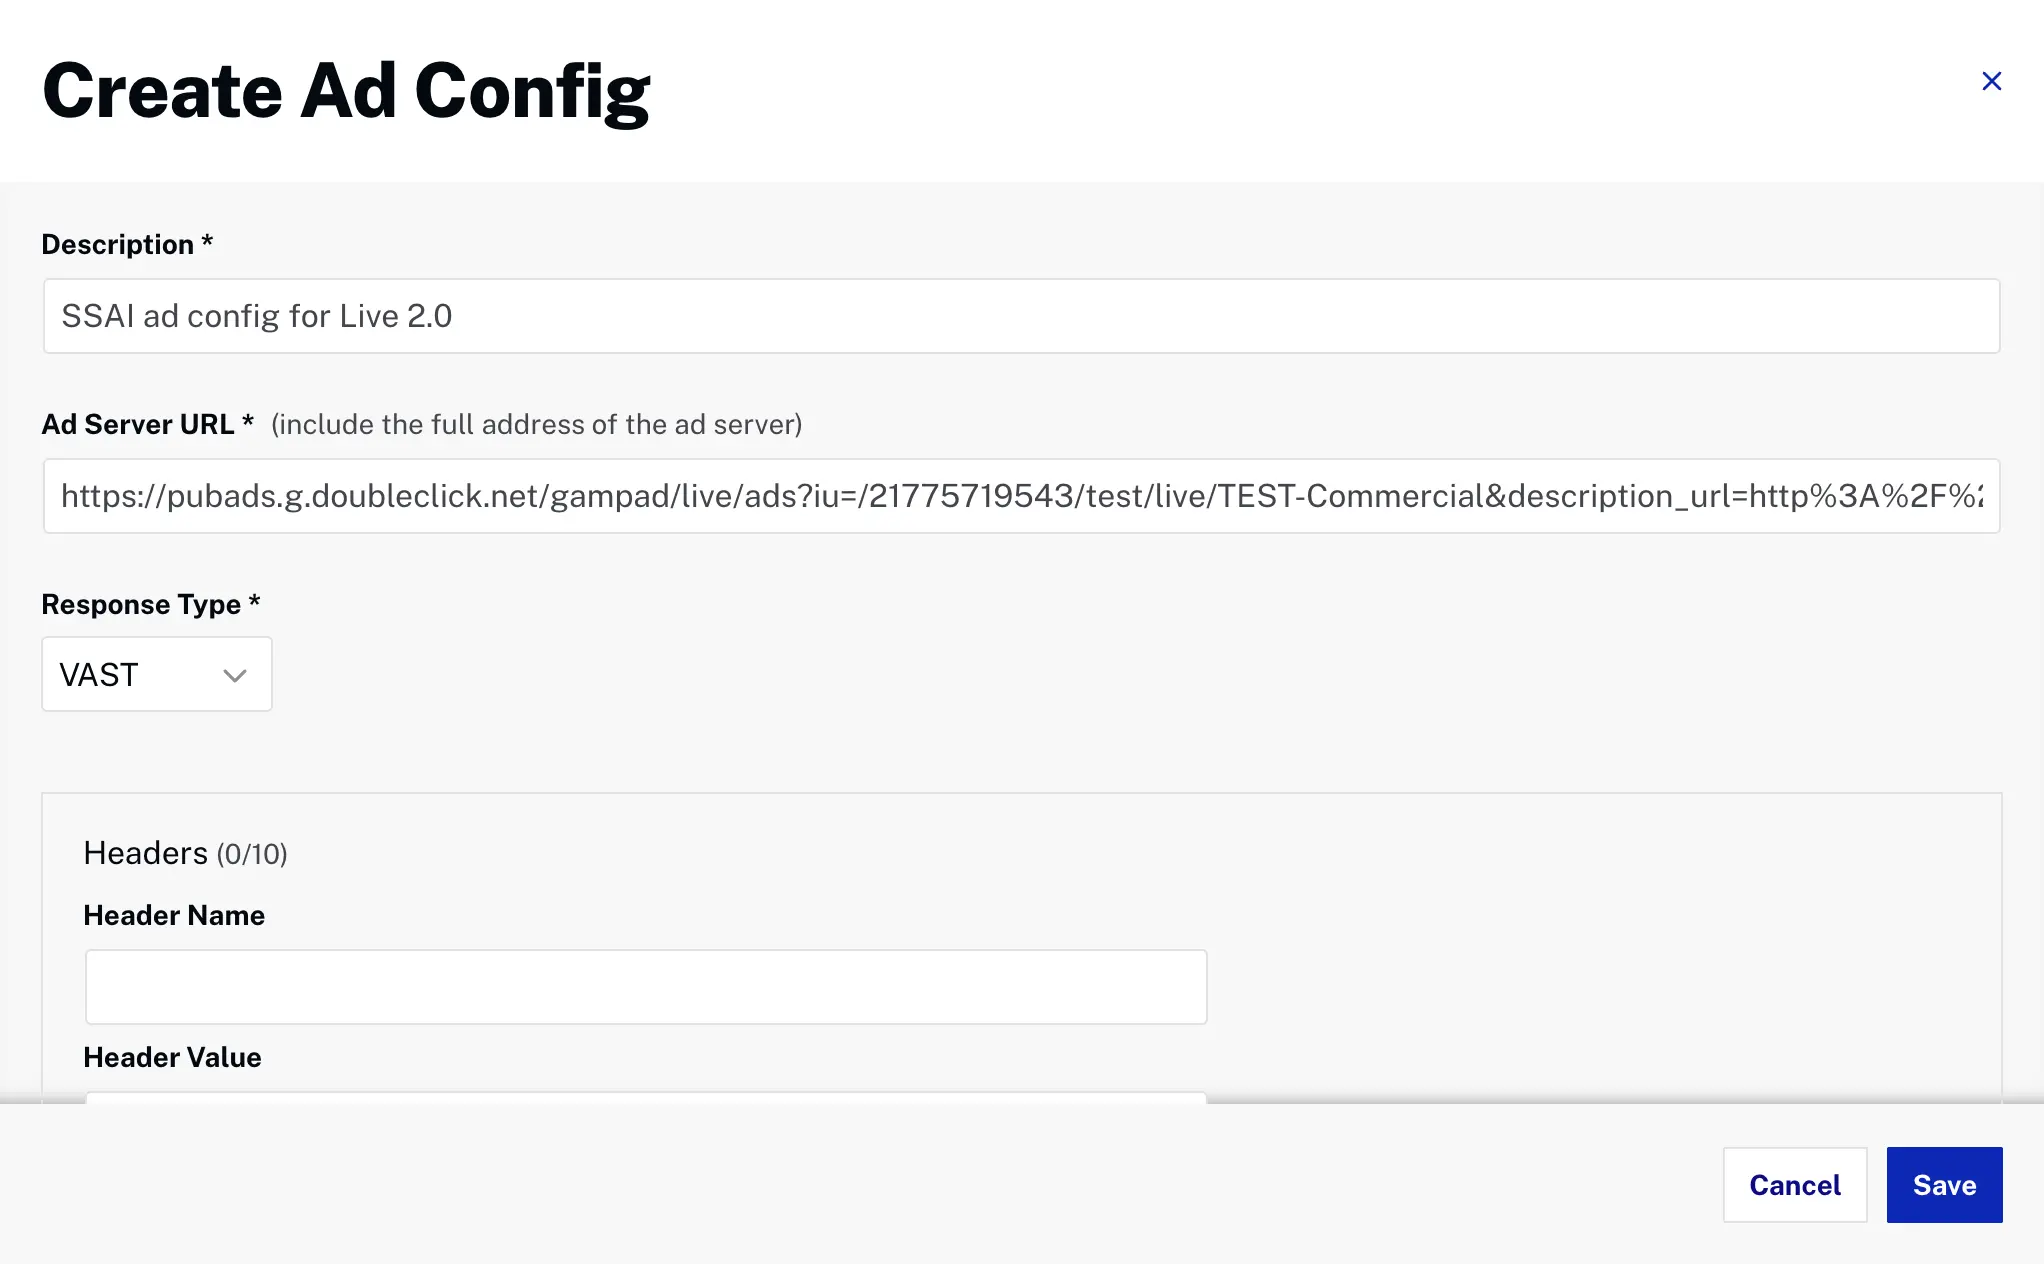
Click Add Ad Config.
Enter the description for your ad configuration.
Configure the ad settings:
Ad Server URL: Enter your ad tag URL from your ad server (supports VAST, VMAP, or DFP endpoints)
Ad Server Response Type: Select VAST, VMAP, or DFP based on your ad server
Configure additional options as needed (these are optional configurations):
Custom Headers: Add custom headers for ad requests and beacons. Some ad servers (such as VideoPlaza) require custom headers. Standard headers like X-Forwarded-For and X-Device-User-Agent are handled automatically
Fill slates are videos displayed when there are gaps in live stream ad breaks that cannot be filled with dynamically-served ads. Fill slates are configured directly during channel creation when SSAI is enabled.
Fill Slate Requirements
Fill slates must be existing video assets in your Video Cloud account with the following characteristics:
Video ID: Must be a valid Video Cloud asset ID
MP4 Rendition: The video asset must have at least one MP4 rendition available
Resolution: Should match your live stream output resolution
Preparing Fill Slate Assets
Before creating SSAI-enabled channels, ensure you have appropriate fill slate videos uploaded to your Video Cloud account:
Navigate to the Media module in Studio.
Upload your fill slate video files (Choose an Ingest Profile that has an MP4 rendition).
Verify the videos have been successfully processed and have MP4 renditions available.
Creating an SSAI-Enabled Live Channel
To display server-side ads in NextGen Live, you must enable SSAI when creating your live channel.
Open the Live module in Studio.
Click Create Channel.
Enter your Channel Name and configure basic settings.
Select an appropriate Live Ingest Profile.
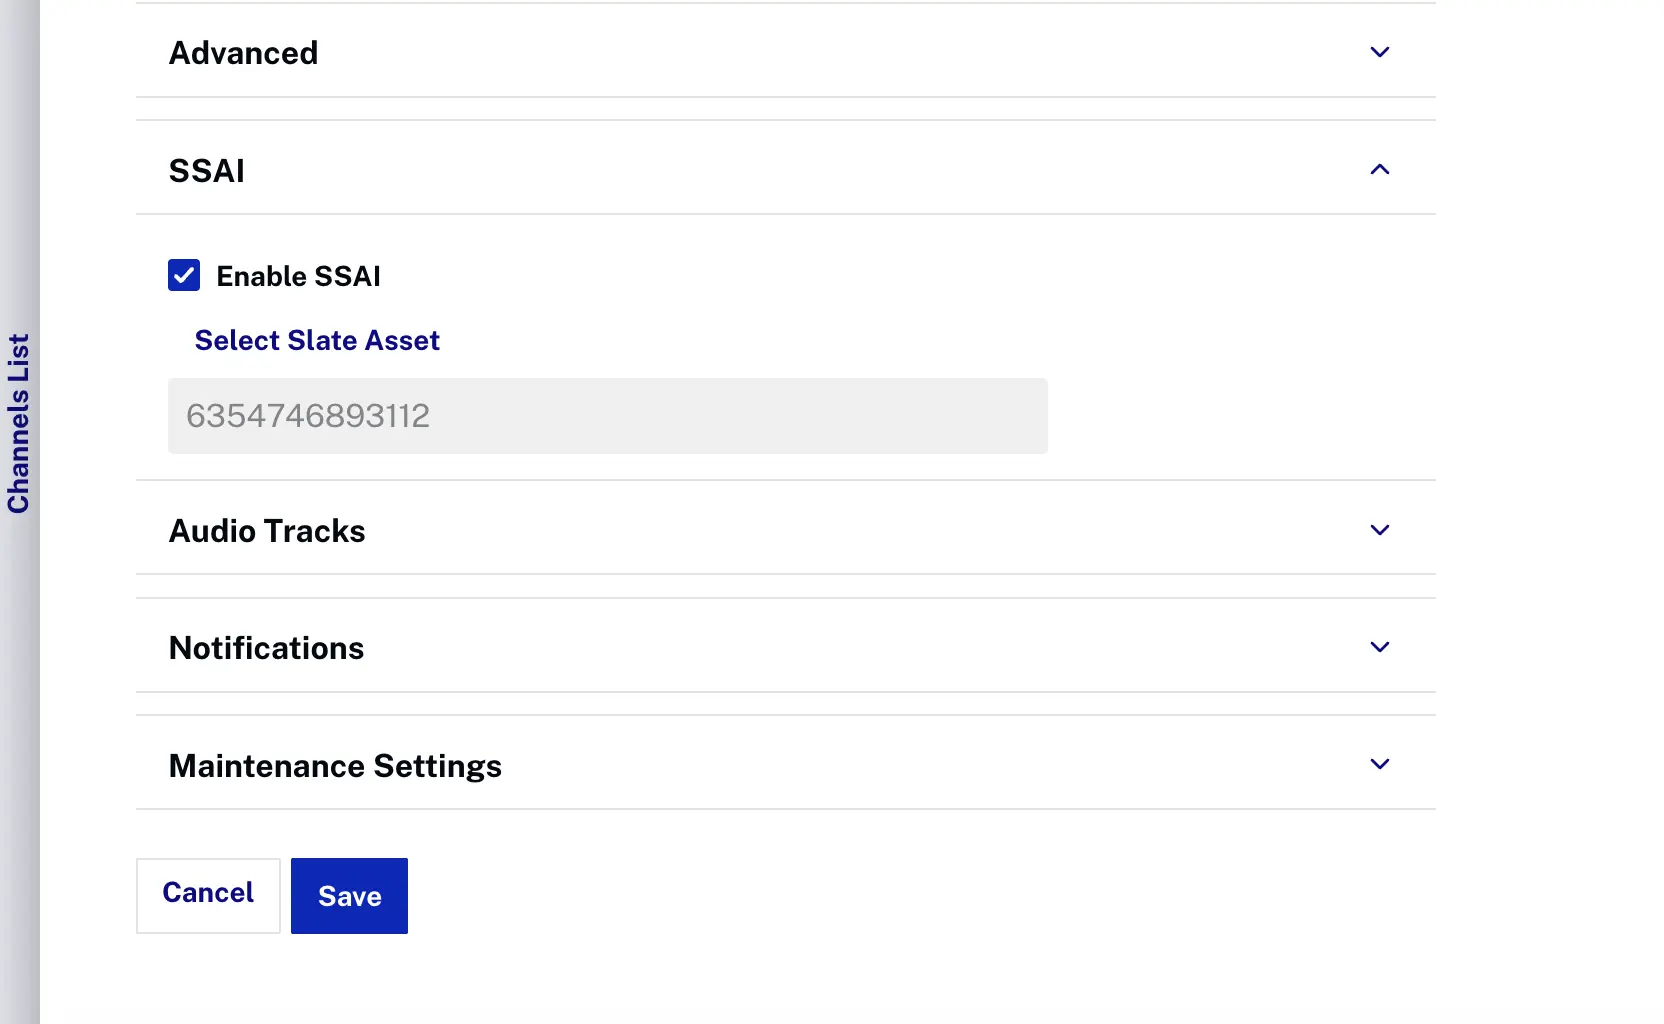
Locate the SSAI section and select Enable SSAI.
Configure the Fill Slate Asset:
Select the Video asset for your fill slate from the list
The list will only show videos with MP4 renditions available
Complete other channel settings as needed.
Click Save to create the SSAI-enabled channel.
The Control Room will open with your channel details, including the streaming endpoint for your encoder.
SCTE-35 Cue Point Insertion
NextGen Live supports both automated SCTE-35 signaling from encoders and manual cue point insertion through the Control Room interface or API.
Automated SCTE-35 from Encoder
Configure your encoder to send SCTE-35 signals for automated ad insertion:
Ensure your encoder supports SCTE-35 signaling
Configure splice insert commands for ad breaks
Set appropriate break durations in the SCTE-35 metadata
Test SCTE-35 signal timing before going live
Manual Cue Point Insertion
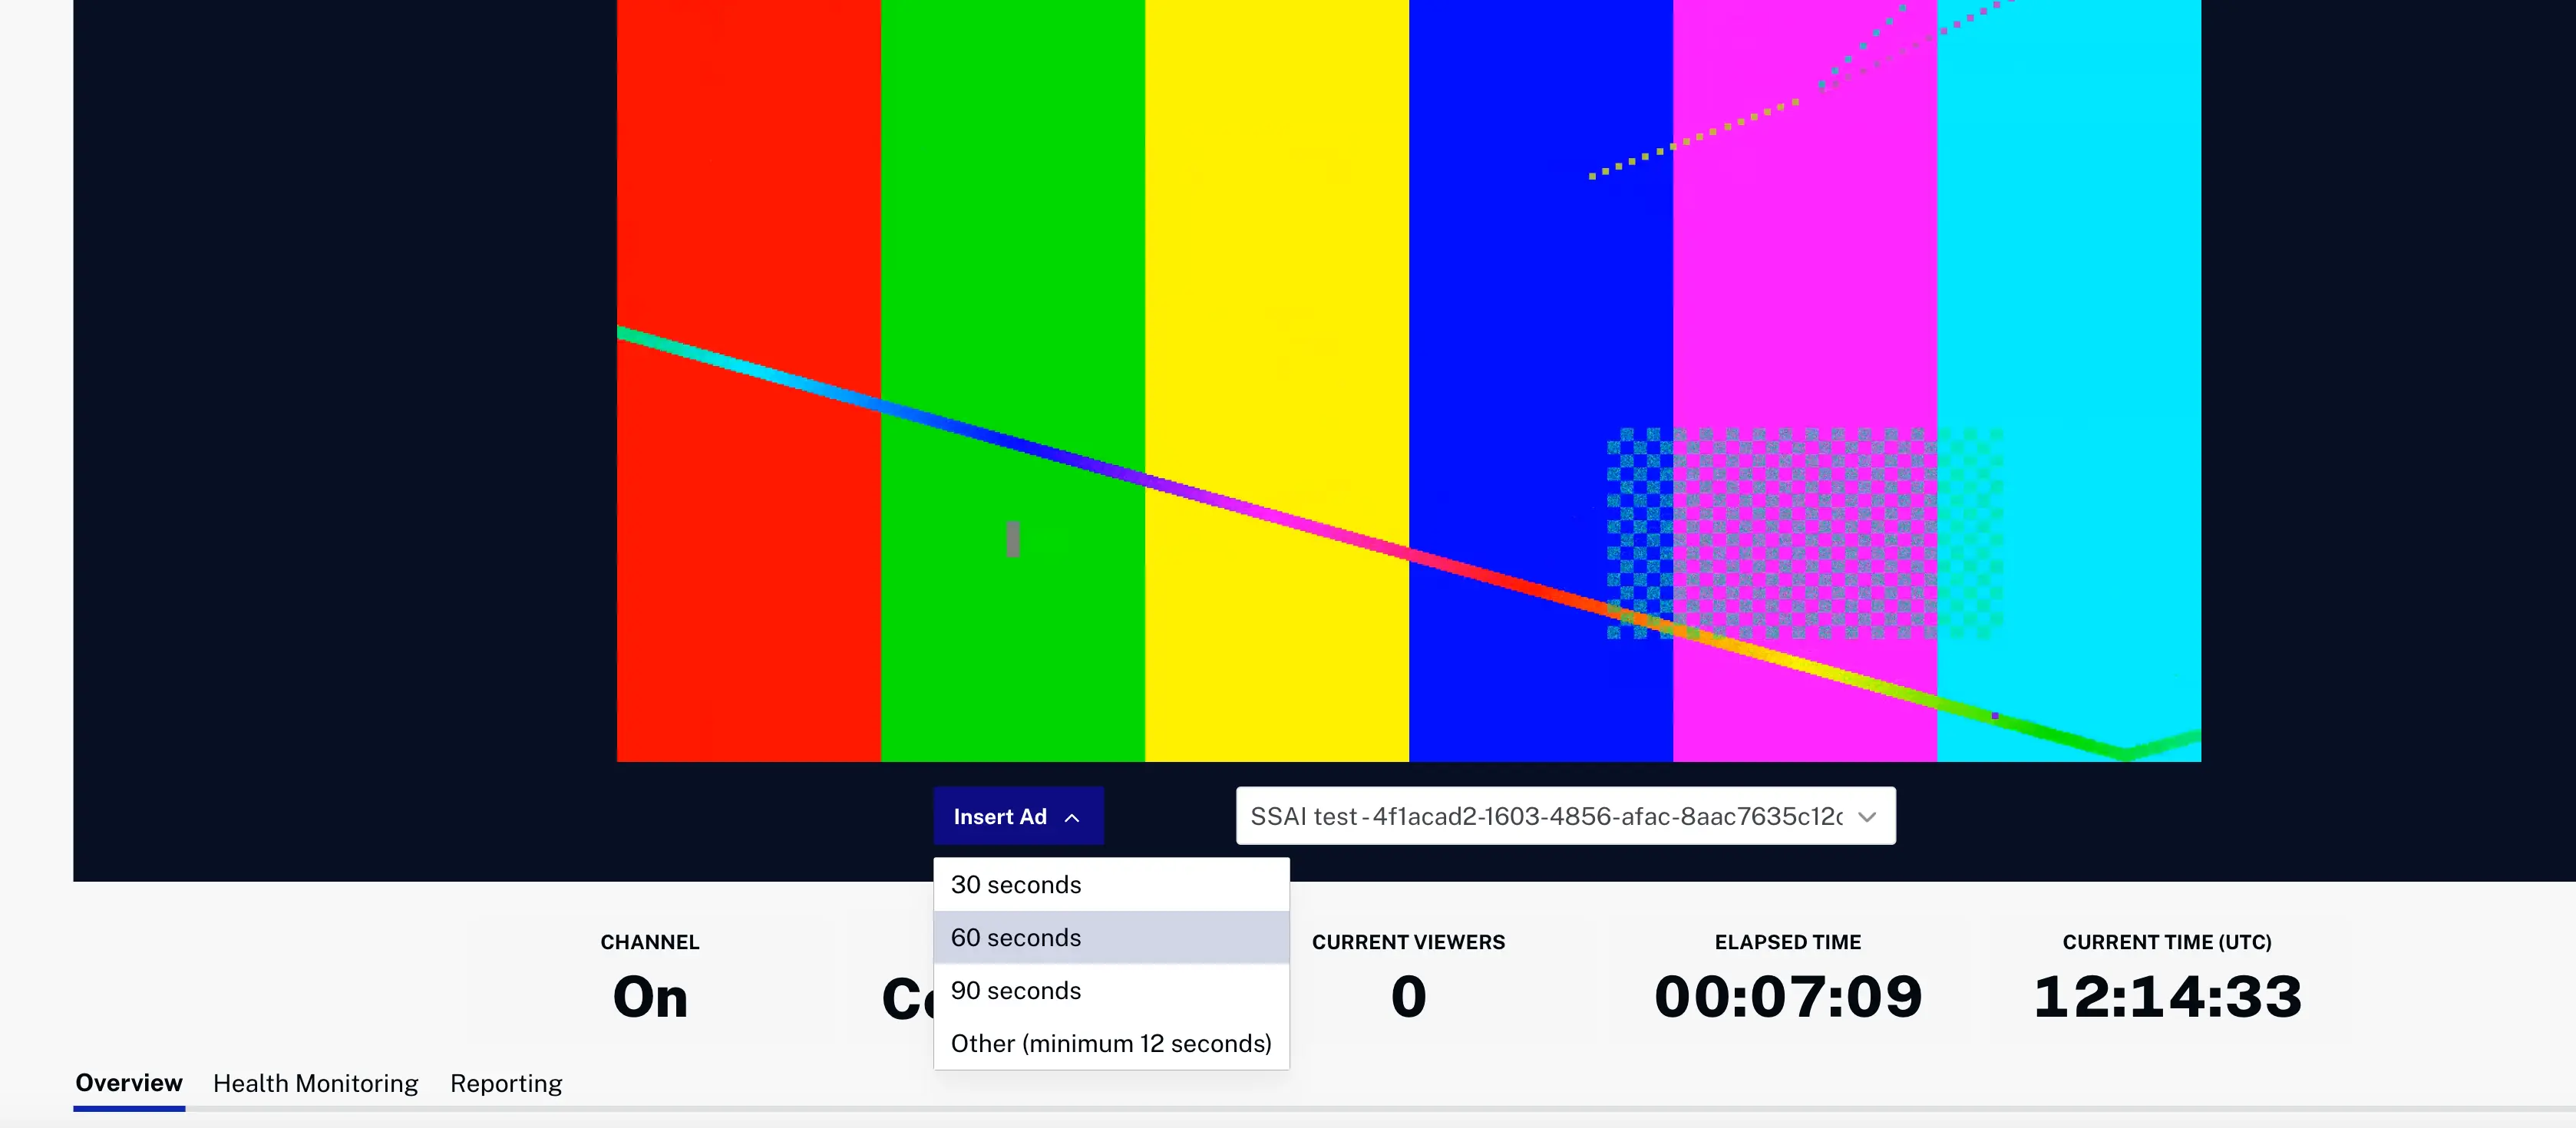
Insert ad breaks manually using the Live Control Room:
In the Control Room, select the ad configuration for the channel and then locate the Ad Insertion controls.
Click Insert Ad.
Select the Ad Break Duration (e.g., 30, 60, 90 seconds).
Monitor the ad playback in the Control Room preview player.
Publishing SSAI-Enabled Live Streams
Live streams with SSAI must be published using the Live module.
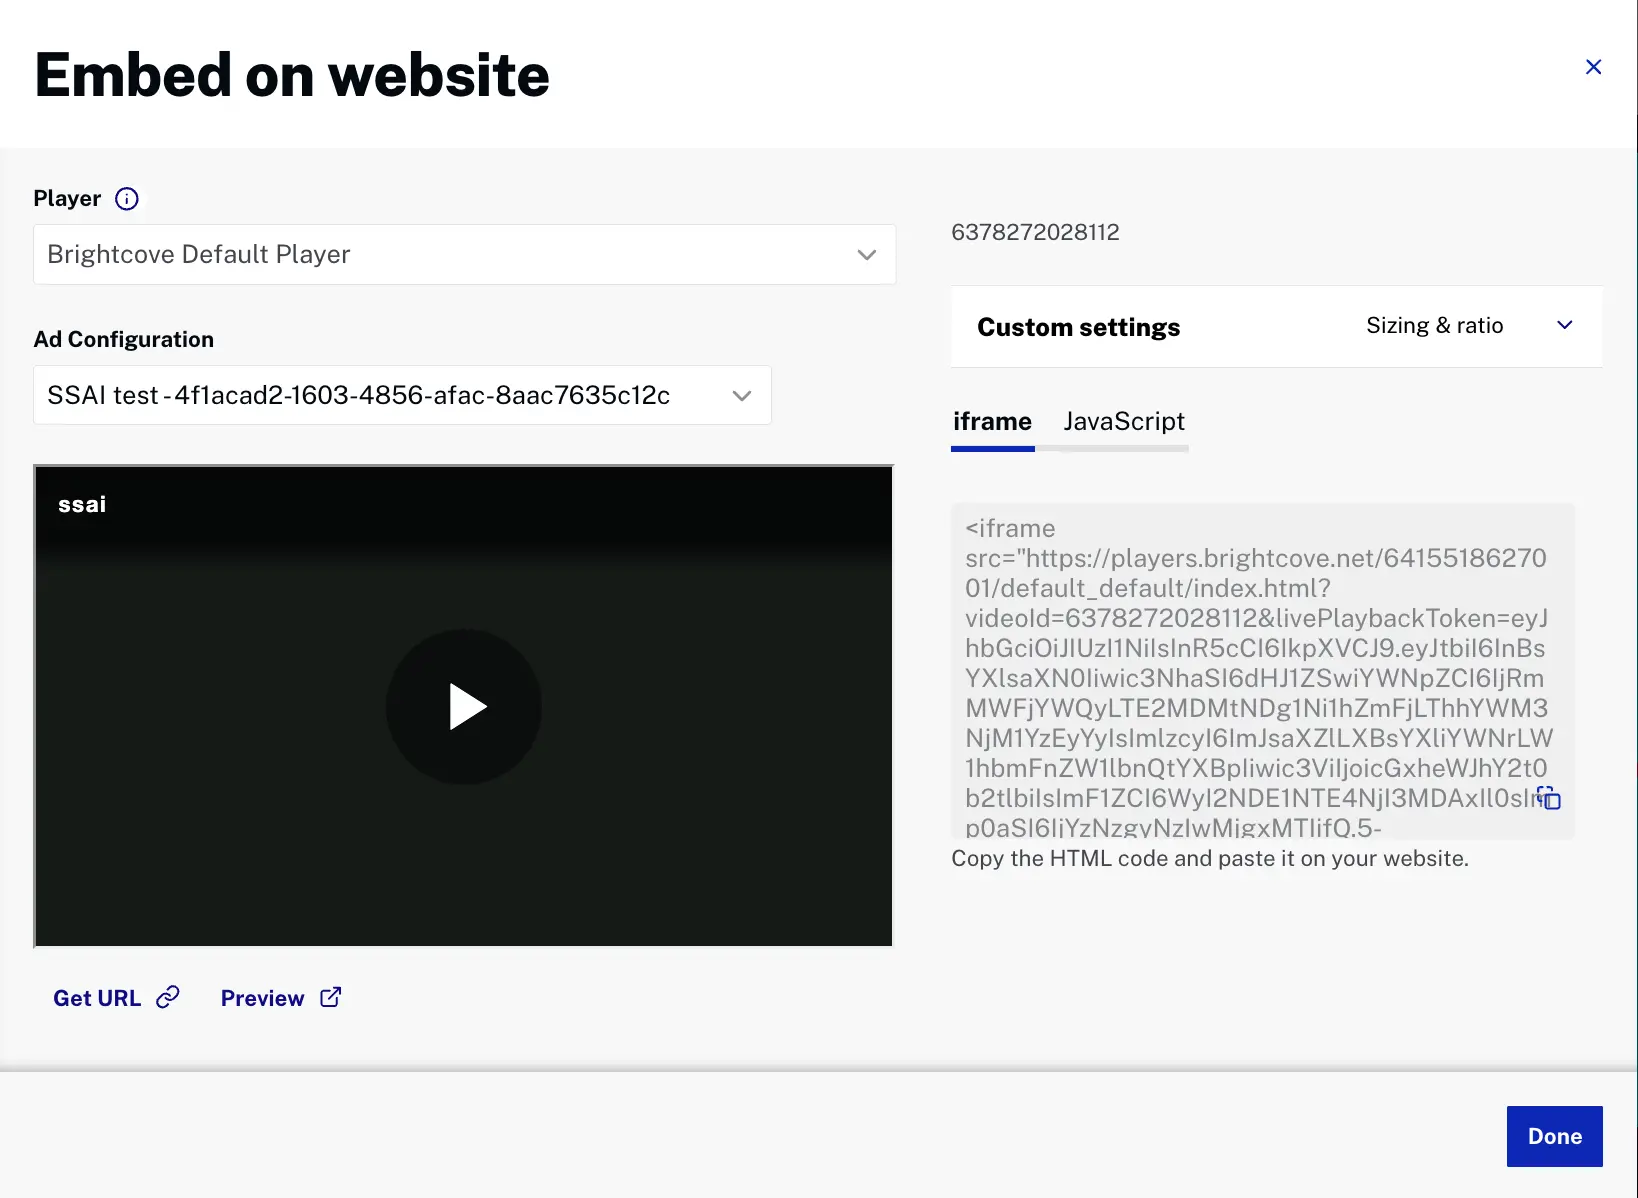
In the Control Room, click Publish and Embed in the left navigation.
Select an Available Player from the dropdown.
Select the Ad Configuration to use with the published player.
Configure additional player settings as needed.
Copy the embed code or use the player URL for your website or application.
Test the published player to ensure ads are displaying correctly.
SSAI Best Practices
Ad Configuration
Test thoroughly: Validate ad configurations before live channels by setting up a test stream using the ad tags from your ad server and make sure ads are being inserted as expected
Fill slate quality: Use high-quality, branded fill slates that match your live stream output resolution for the best user experience
Troubleshooting SSAI Issues
Common Issues
Ads not displaying
Verify SSAI is enabled on the channel
Check ad configuration settings and ad server URL
Confirm ad server is responding correctly
Review SCTE-35 signal timing and format
Fill slates appearing instead of ads
Check ad server response times and availability
Verify ad inventory is available for the requested time slot