This guide explains how to configure DVR (Digital Video Recording) functionality with Brightcove NextGen Live, including limitations and best practices for optimal viewer experience.
DVR functionality allows viewers to pause, rewind, and replay portions of your live stream, providing a more flexible viewing experience. NextGen Live offers robust DVR capabilities designed to ensure optimal performance and user experience.
After completing this guide, you should be able to:
Understand DVR window limitations in NextGen Live
Configure DVR settings for your live channels
Generate proper embed code with playback tokens for DVR functionality
Reset the DVR window when needed
Optimize DVR settings for the best viewer experience
Audience
Publishers who need to configure DVR functionality for their live streaming channels using NextGen Live.
DVR Limitations and Considerations
Maximum DVR Window: NextGen Live supports a maximum DVR window of 86,400 seconds (24 hours).
Longer DVR windows may impact player performance and user experience.
Steps to configure DVR
To configure DVR for your live channel, you will complete the following tasks:
Click the Create Channel button to create a new channel.
Enter a Channel Name.
If your account has been configured with required custom fields, make sure the custom fields are assigned values.
Select a Live Ingest Profile from the dropdown list.
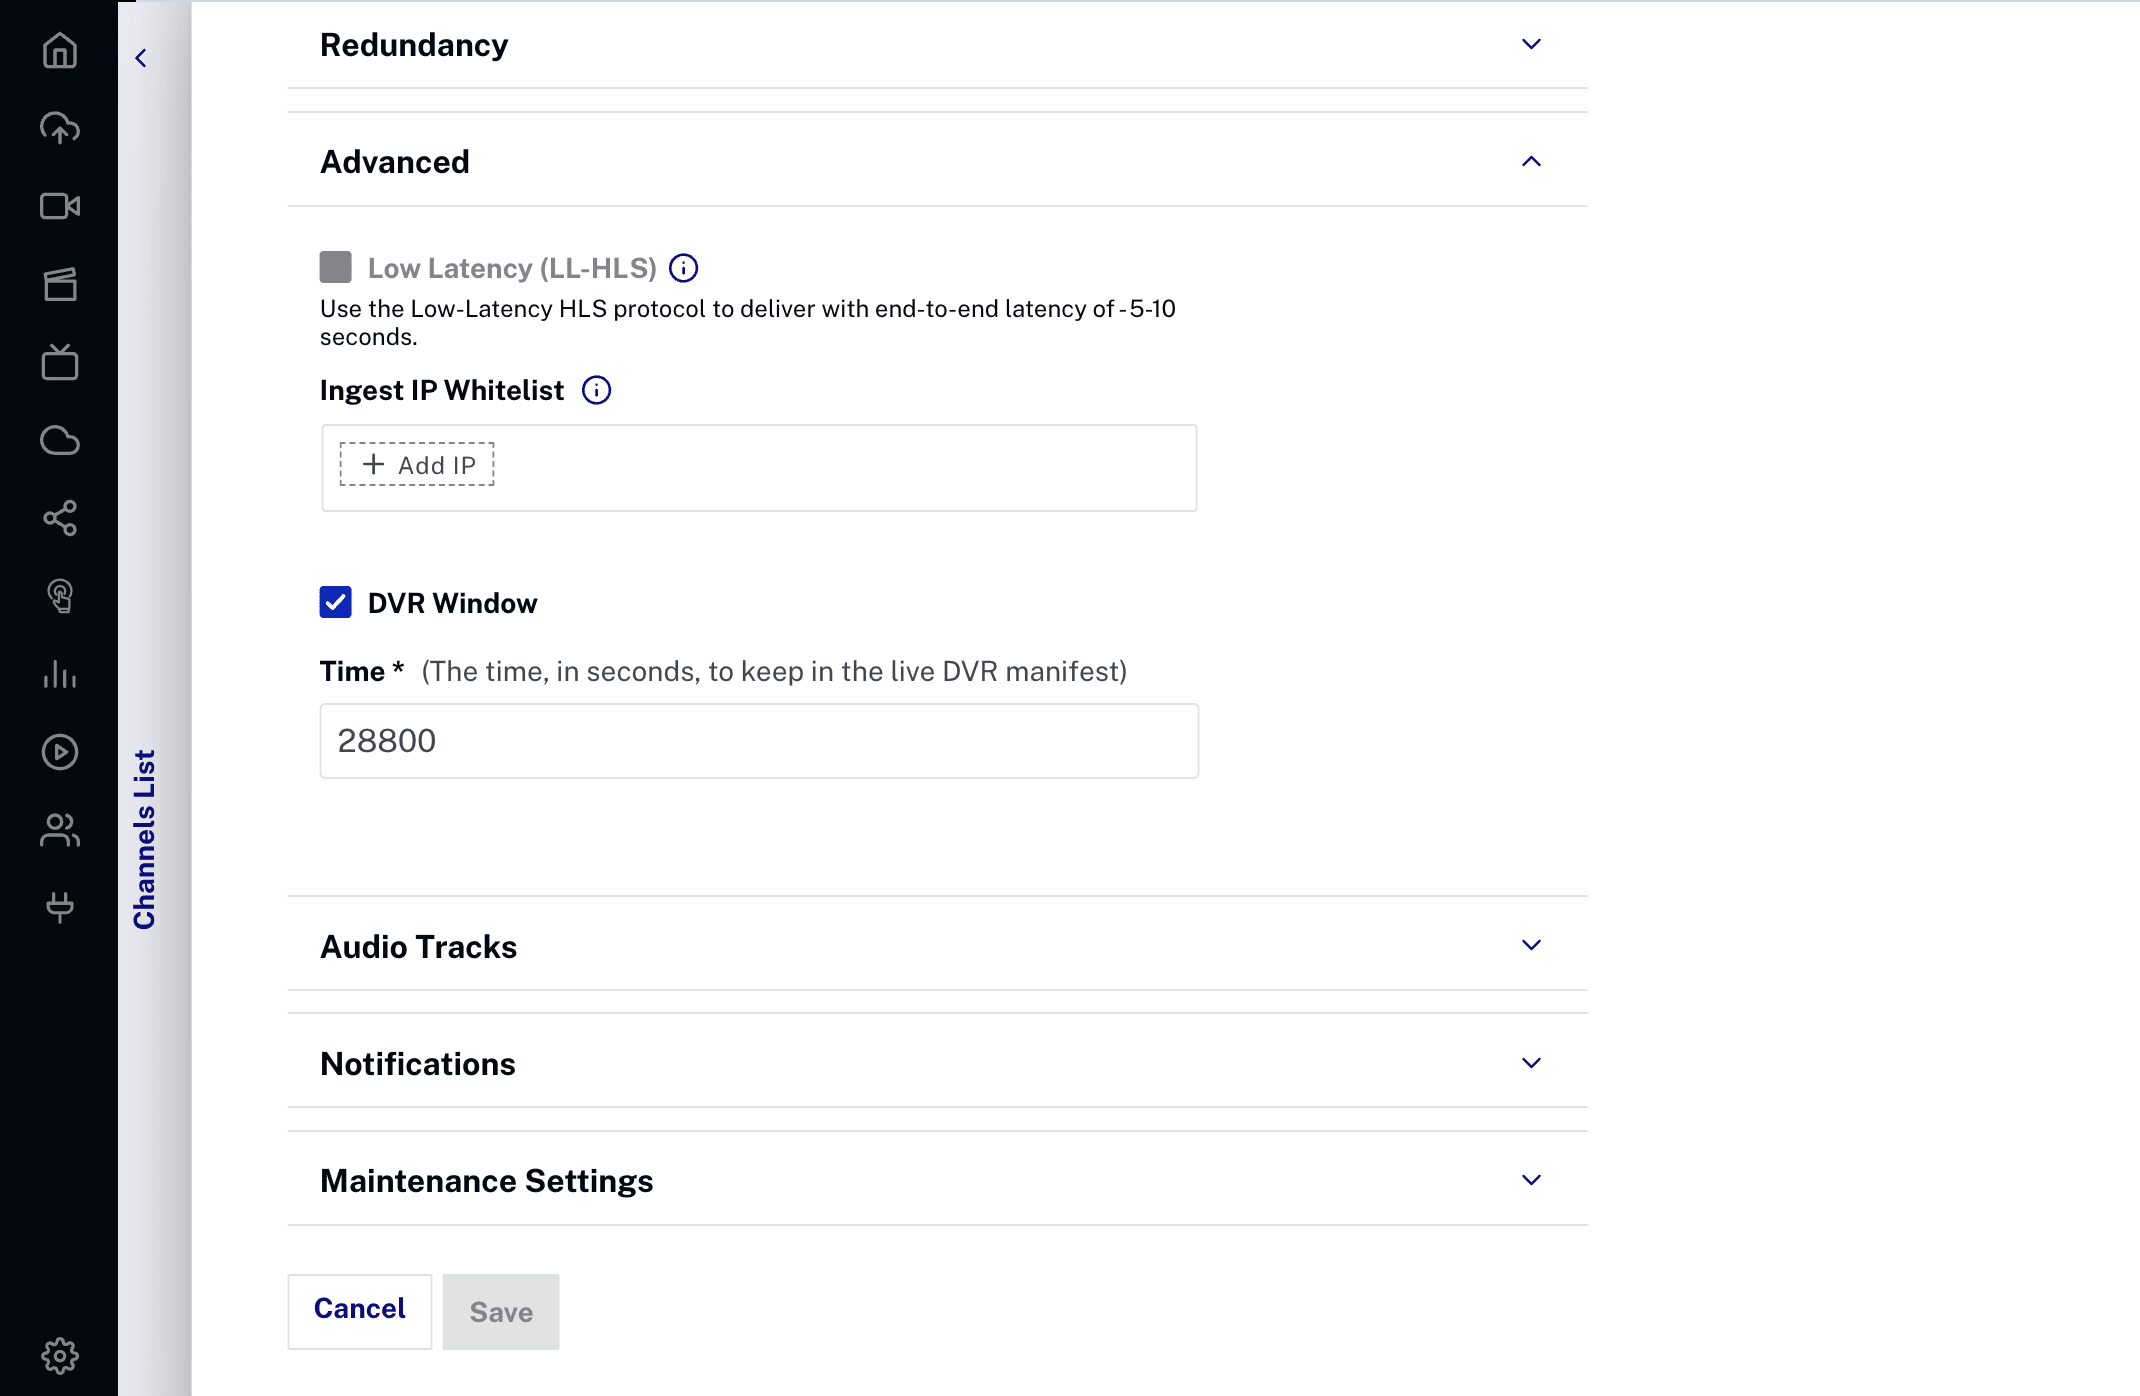
In the Advanced Options section, locate the DVR Window setting.
Enter your desired DVR window duration in seconds (maximum 86,400 seconds / 24 hours).
Configure other channel settings as needed.
Click Save to create the channel with DVR enabled.
Configuring DVR window settings
The DVR window determines how far back viewers can rewind in your live stream. Consider these factors when setting your DVR window:
Content Type: News broadcasts may need shorter windows (30-60 minutes), while sports channels might benefit from longer windows (2-4 hours).
Viewer Behavior: Analyze how your audience typically interacts with live content.
Technical Considerations: Longer DVR windows require more resources and may impact performance.
Publishing and embedding DVR-enabled channels
After configuring DVR for your channel, you need to generate the proper embed code to ensure DVR functionality works correctly:
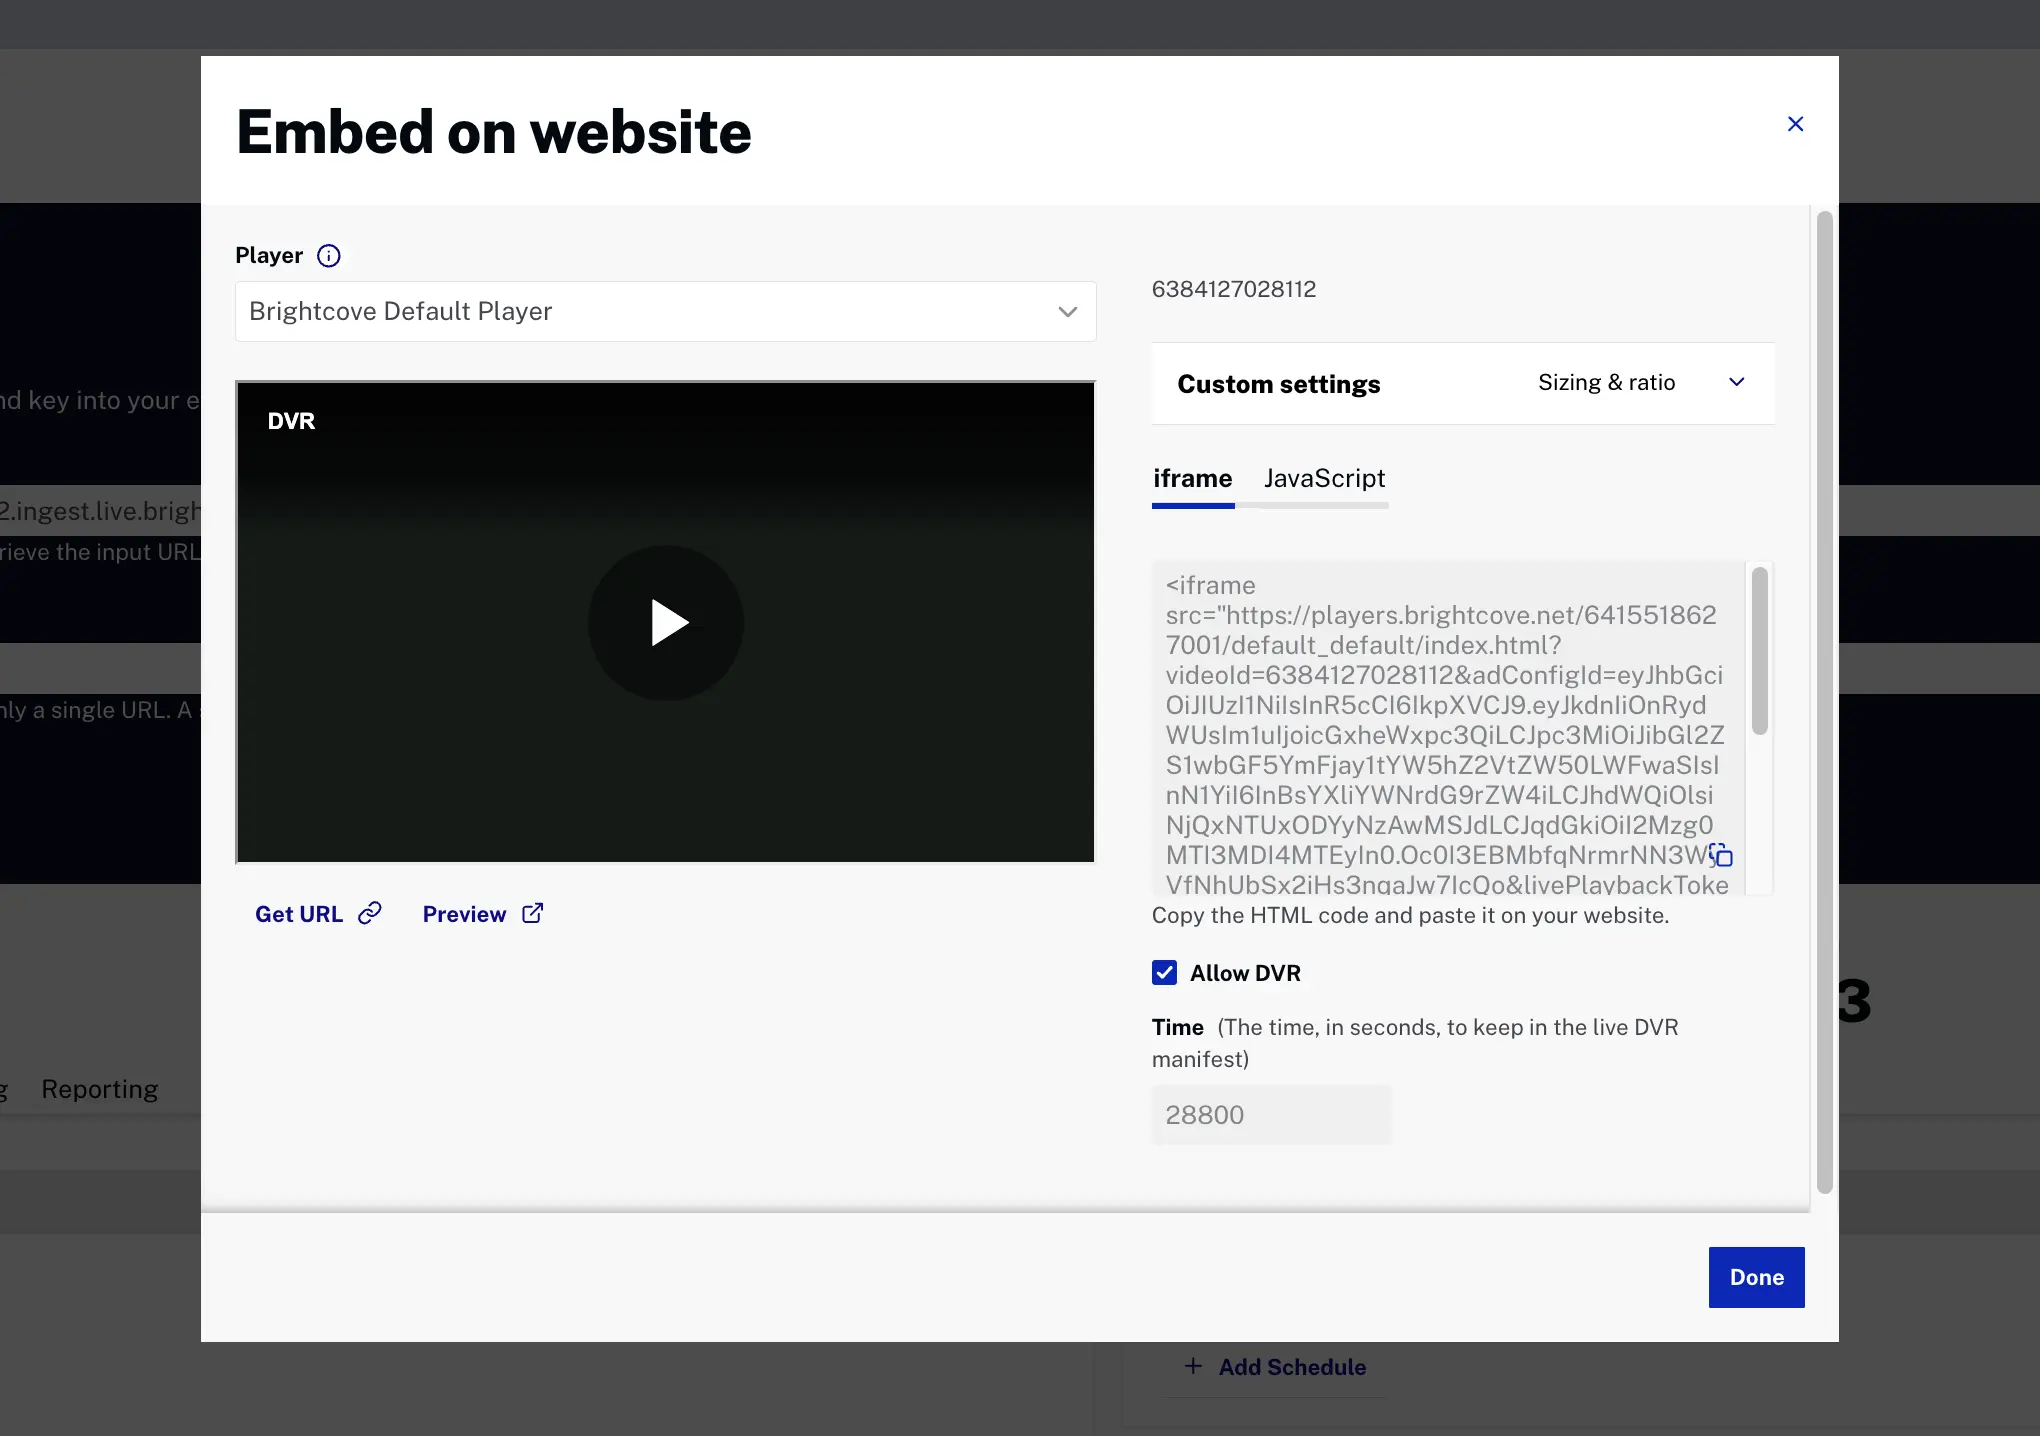
In the Control Room for your channel, click Publish and Embed in the top right corner.
Select a Player from the dropdown menu.
Configure player settings as needed:
Sizing: Fixed or Responsive
Aspect Ratio: Select your preferred aspect ratio
Player Dimensions: Set width and height
Important: Check the Allow DVR checkbox to enable DVR functionality in the embed code.
Choose your embed code type:
iframe: Standard iframe embed (includes livePlaybackToken as a URL parameter)
JavaScript (Advanced): Advanced embed with video-js tag (includes data-live-playback-token attribute)
Copy the generated embed code.
Understanding the playback token
The livePlaybackToken (in iframe embeds) or data-live-playback-token (in JavaScript embeds) is a JWT (JSON Web Token) that contains configuration information for your live stream, including DVR settings. NextGen Live automatically generates this token when you create embed code through the Publish and Embed interface.
After configuring DVR and embedding your player with the playback token, it's important to test the functionality to ensure it works as expected:
Ensure you've embedded the player using the code generated from the Publish and Embed interface (with the playback token included).
Start your live stream as normal.
Wait for the stream to be active and processing.
Open the published player in a browser.
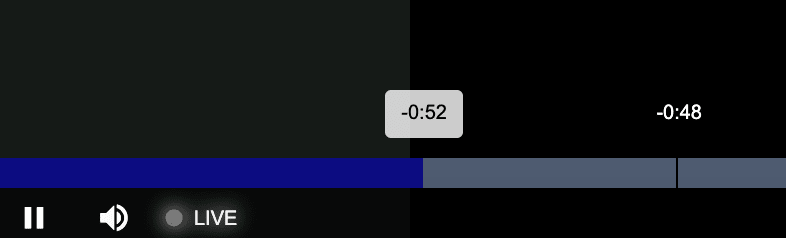
Verify the DVR progress bar is displayed and shows the available DVR window.
Test the rewind functionality by clicking and dragging the playhead backward.
Test seeking to different points within the DVR window.
Click the "Live" button to return playhead to the live edge.
Resetting the DVR window
NextGen Live provides the ability to flush the DVR content for a channel, effectively resetting the DVR window. This operation clears all buffered DVR content and starts fresh.
What DVR reset does
When you reset the DVR window for a channel:
All buffered DVR content is permanently removed
Timeshift playback functionality will no longer work for previously recorded content
Live-to-VOD clipping features will be unavailable for the flushed content
Only new content streamed after the reset will be available for DVR, timeshift, and clipping
When to use DVR reset
This operation is useful when you need to:
Clear the buffer for compliance or content management purposes
Refresh content after a technical issue or encoder reconnection
Remove content from the DVR buffer for any reason
How to reset the DVR window
To reset the DVR window for a channel:
In the Control Room for your channel, locate the Flush DVR button (next to the DVR Window setting).
Click the Flush DVR button.
Confirm the action when prompted.
Wait for the operation to complete. If streaming live, viewers may experience brief playback interruption.
Using the API to reset DVR
You can also reset the DVR window programmatically using the Live API 2.0:
POST https://api.bcovlive.io/v2/accounts/{account_id}/jobs/{id}/reset_origin
Authorization: BC_OAuth2 {access_token}
Content-Type: application/json