Creating a form in Salesforce
The Web-to-Lead feature in Salesforce can be used to generate lead information from website visitors. These forms can also be displayed inside of Brightcove players. The steps below will create a simple form to capture first name, last name, email address, company, city and state/province. For complete details on the Web-to-Lead feature, see the Salesforce documentation.
- Login to your Salesforce account.
- From Setup, enter
Web-to-Leadin the Quick Find box and then click Web-to-Lead. - Click Create Web-to-Lead Form.
- Select fields to include on your Web-to-Lead form. Use the Add and Remove arrows to move fields between the Available Fields list and the Selected Fields list, and use the Up and Down arrows to change the order of the fields on your form.
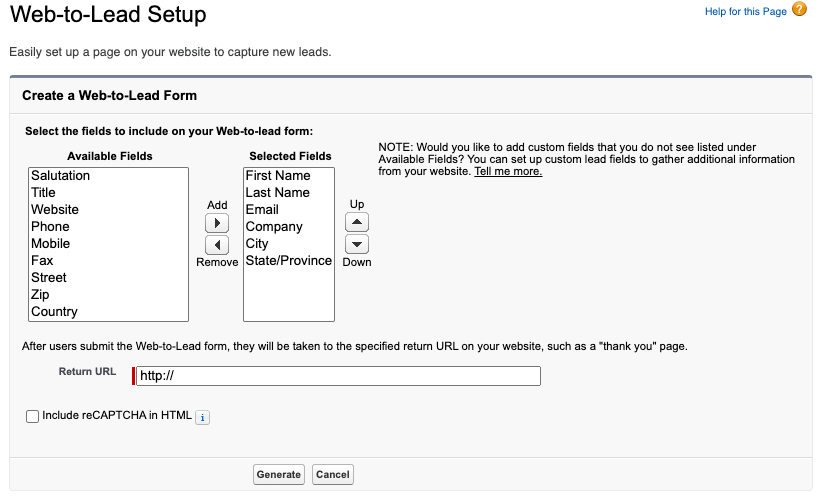
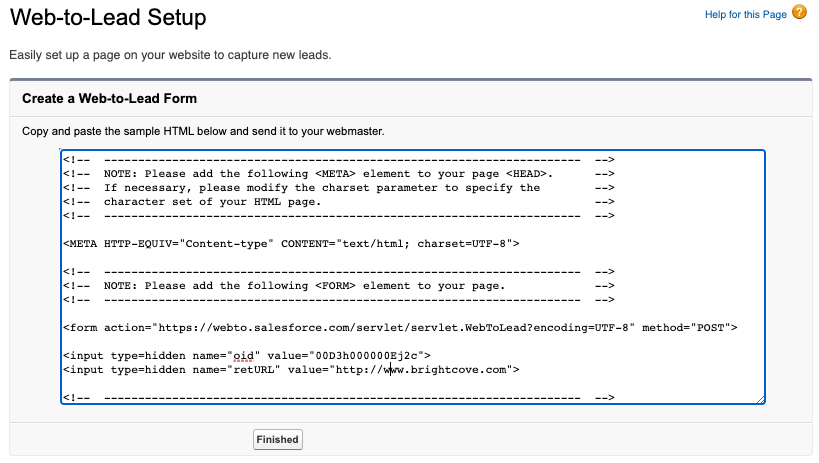
- Enter a Return URL. For this example, the Return URL will be set to http://www.brightcove.com. This value will be ignored when the form is used as a custom lead form inside of the Campaign module.
- Click Generate. The form HTML will be displayed.