Setup process

There are three parts to the setup process, which are detailed in the steps listed below:

Enable S3 access

  1. Log In into your Blueshift account.
  2. From the Account Settings page, click on the Amazon S3 Folder Details section. There will be access details. The blocked-out lines contain the account-specific details needed for granting access to the Blueshift S3 bucket.
    Amazon S3 Folder Details

Integrating with Brightcove

  1. Log In into your Video Cloud account.
  2. Open the Admin module and then click Integrations.
    Integration Section
  3. Click the Add integration button.
    Integration Button
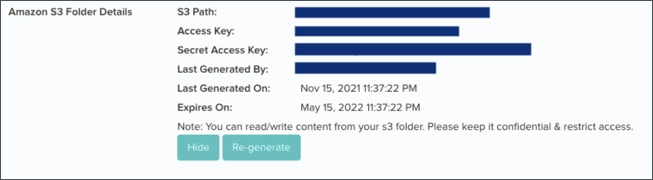
  4. Select Blueshift from the dropdown. Use the Access Key and Secret Access Key from the Blueshift folder details page.

    The S3 Path field follows the following pattern with the customer-specific name inserted: bsft-customers/{BLUESHIFT_SITE_NAME}/customer_attributes/

    Blusehift
  5. Click Save.

Configure integration with Blueshift

  1. Log In into your Blueshift account.
  2. On the left-hand side menu, click on Customer Data and then select Attributes.
  3. From that page, click +Customers button in the top right corner and select Upload CSV from the dropdown.
    +Customer
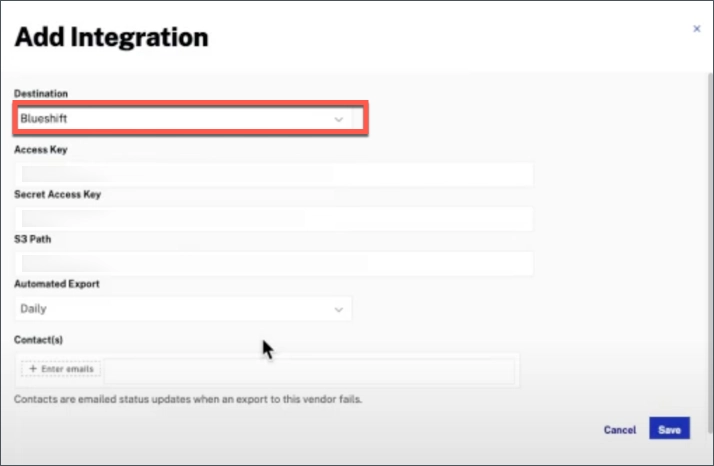
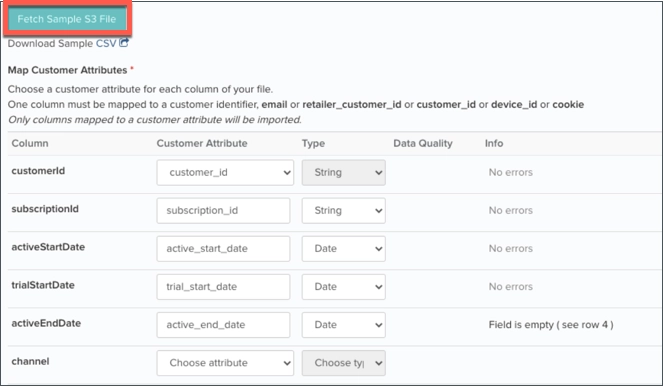
  4. You will see the following page:

    CSV Upload

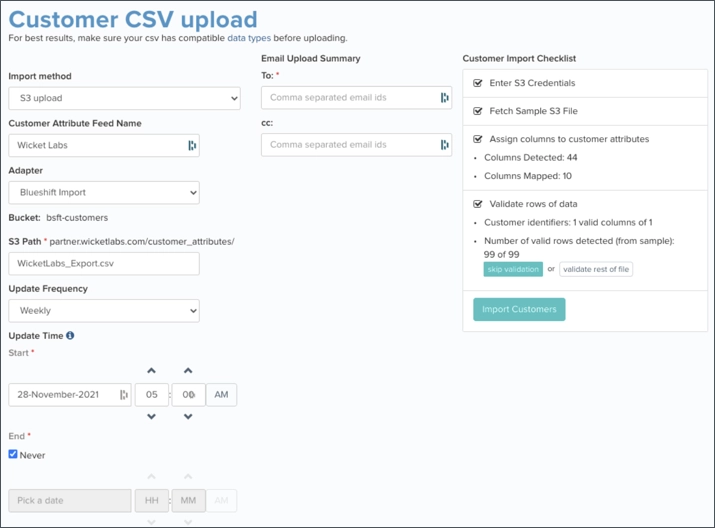
    When setting up the S3 Path, the file name must be WicketLabs_Export.csv. This is the file name that Audience Insights uses when writing to the Blueshift bucket, and it must match exactly.

    Other options in this section include how frequently to check this bucket for a new file. If using the daily automated export in Audience Insights, setting the Update Frequency to Daily and the time to 5 AM is recommended.

Mapping fields

  1. Clicking the Fetch Sample S3 File will pull the latest exported report. It will pull up a table mapping column names from the Audience Insights report to Blueshift properties. New properties can also be created from this screen.
    Fetch sample
  2. Here is a sampling of the report file mapped to the Blueshift fields.
    Fetch sample
  3. Click Save, and the upload should begin.